

CSL DD/DD Pro shaft and stem interface slop solution
 Hung Le
Member
Hung Le
Member
I recently bought one of those "flex fix" 3d printed sleeves things from Etsy. Really all they do is snug up against the metal QR to remove some slop on that end.
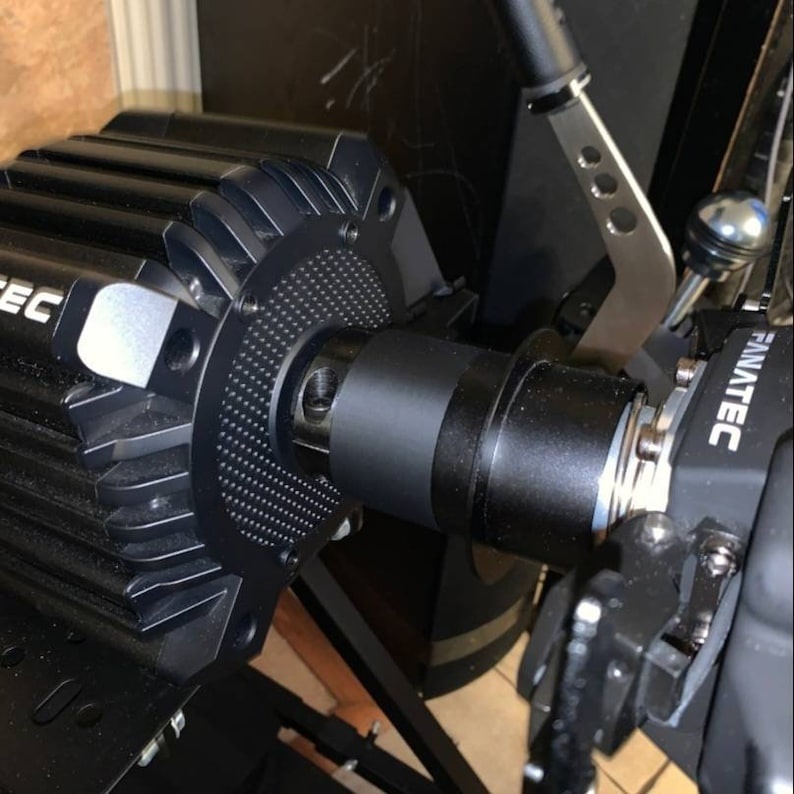
But we all know the real weakness is at the shaft end.
The small movements over time cause disconnections and then we have to tighten the collar again, and again. I wish there was a way to get that stem against the tightened collar. So here's what I did.
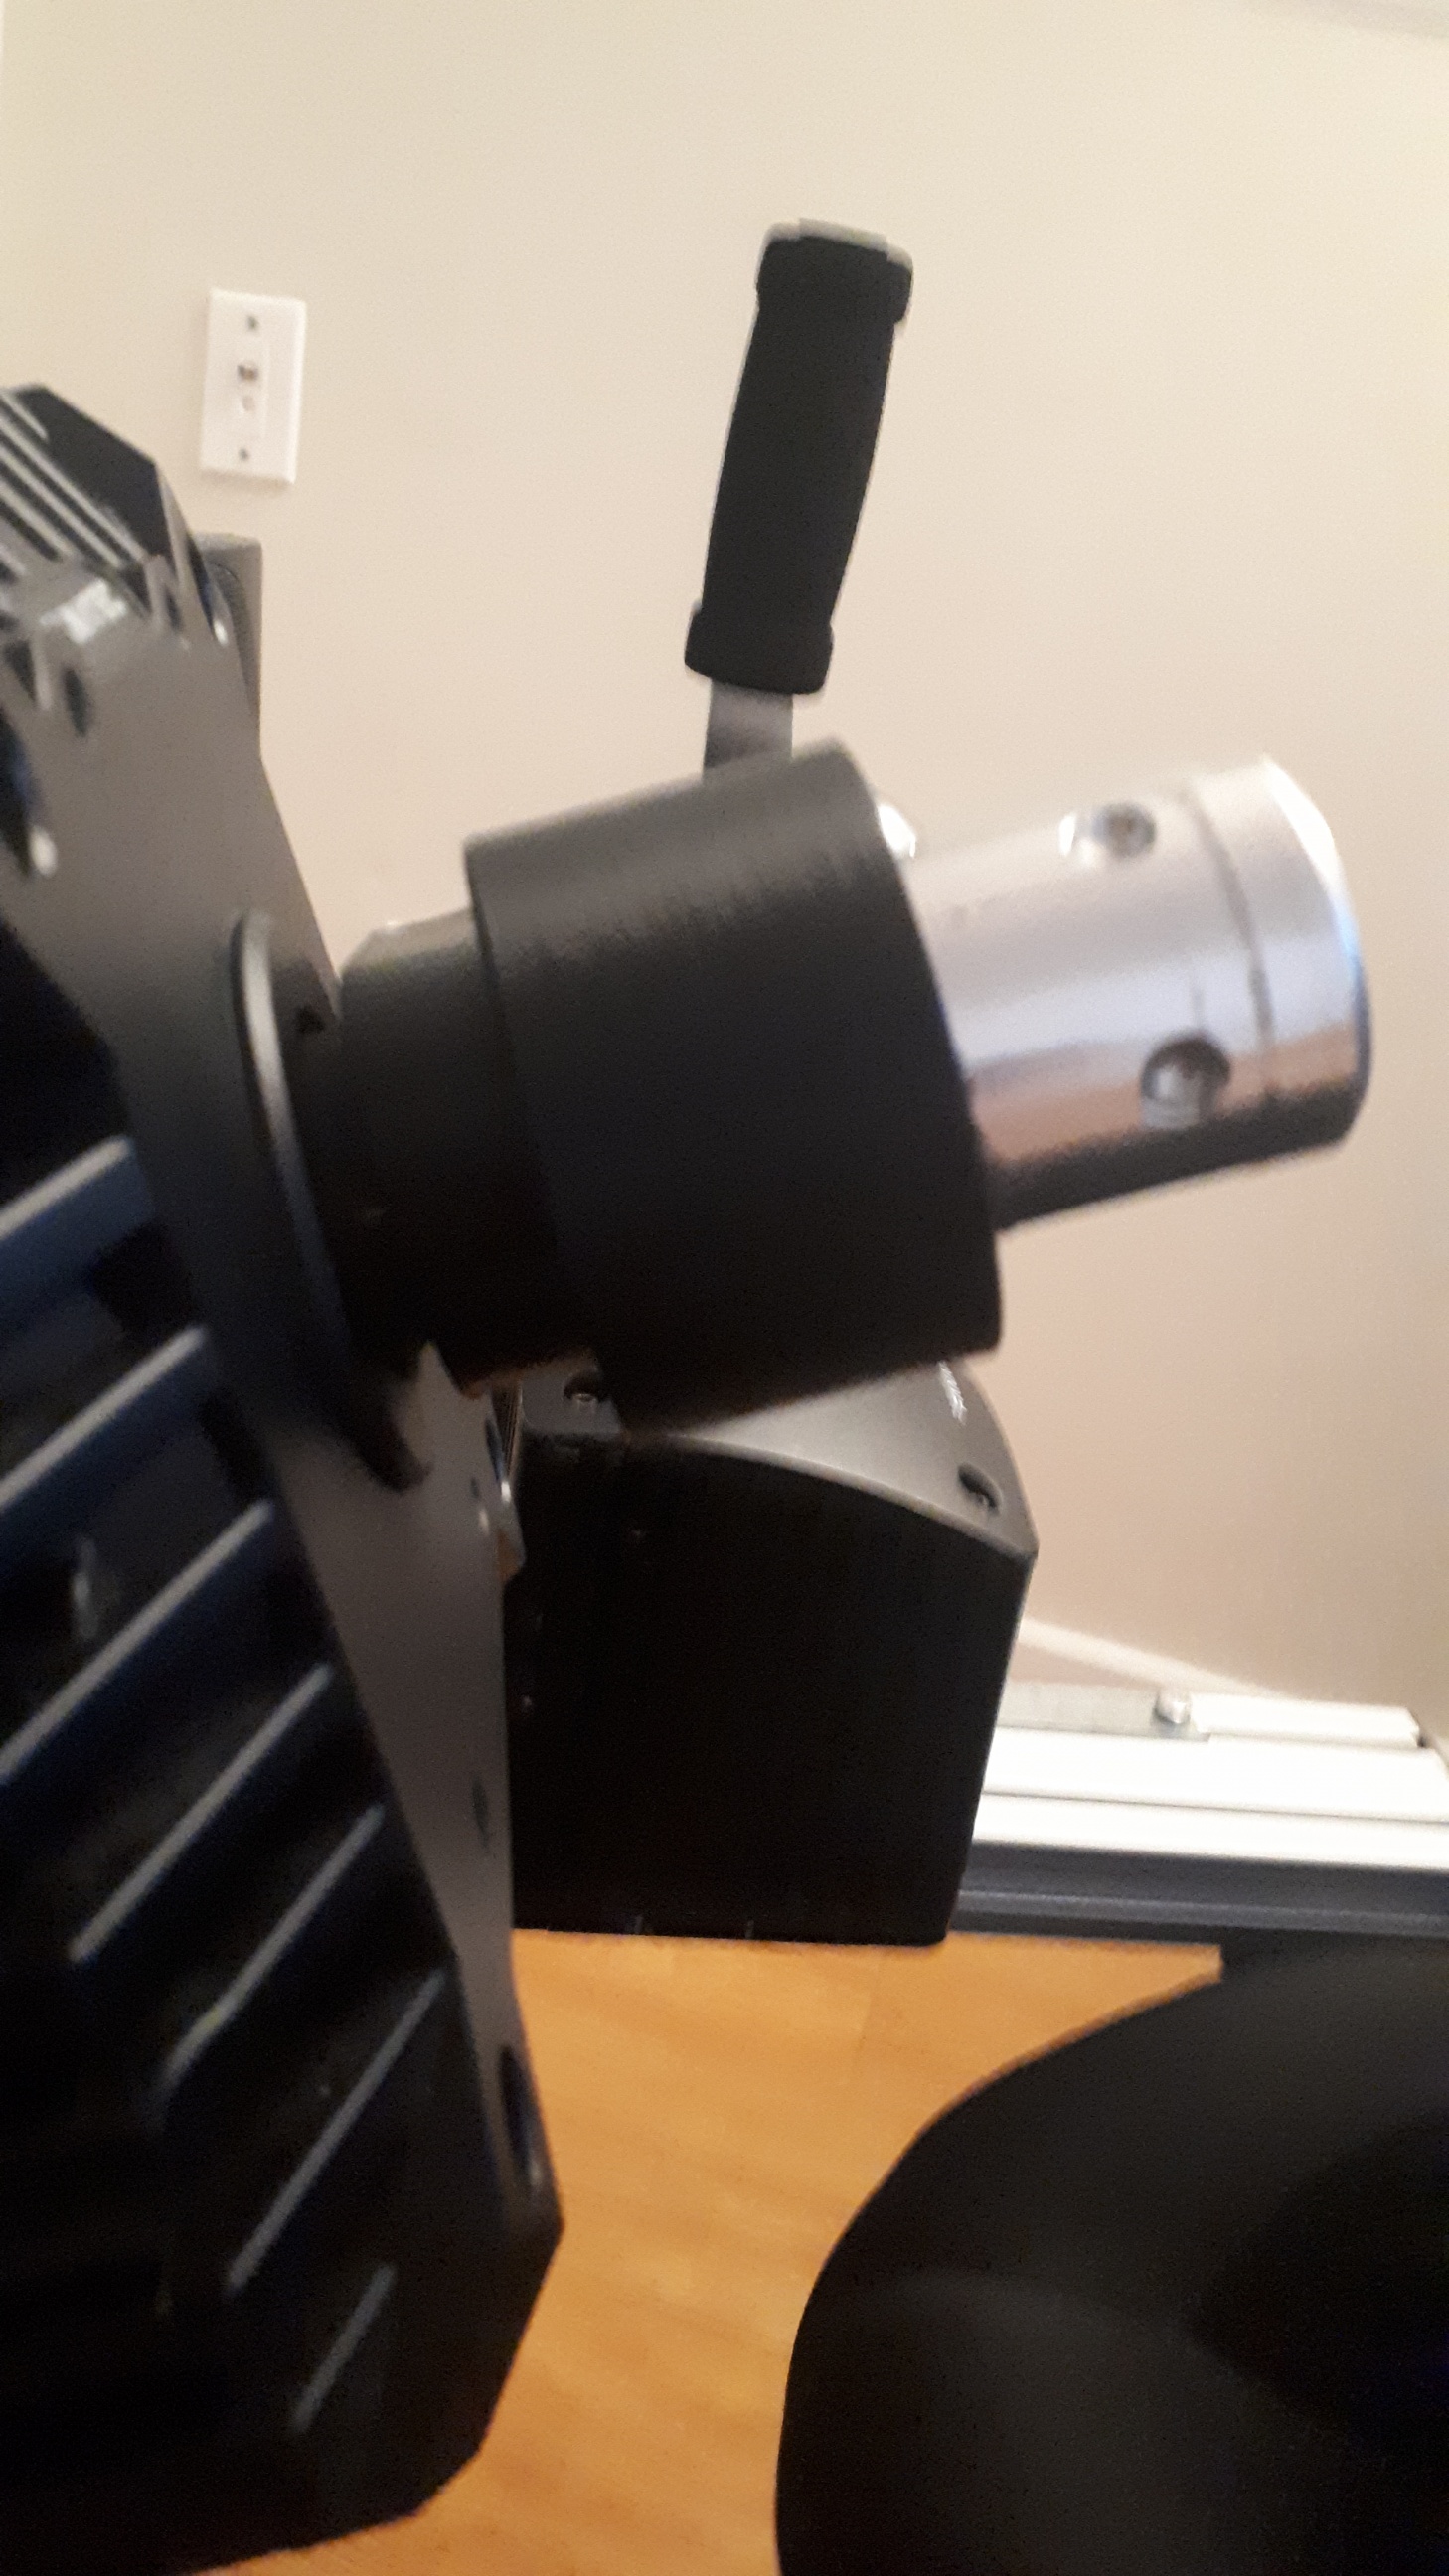
The flex fix thing I bought from AT3DSimShop
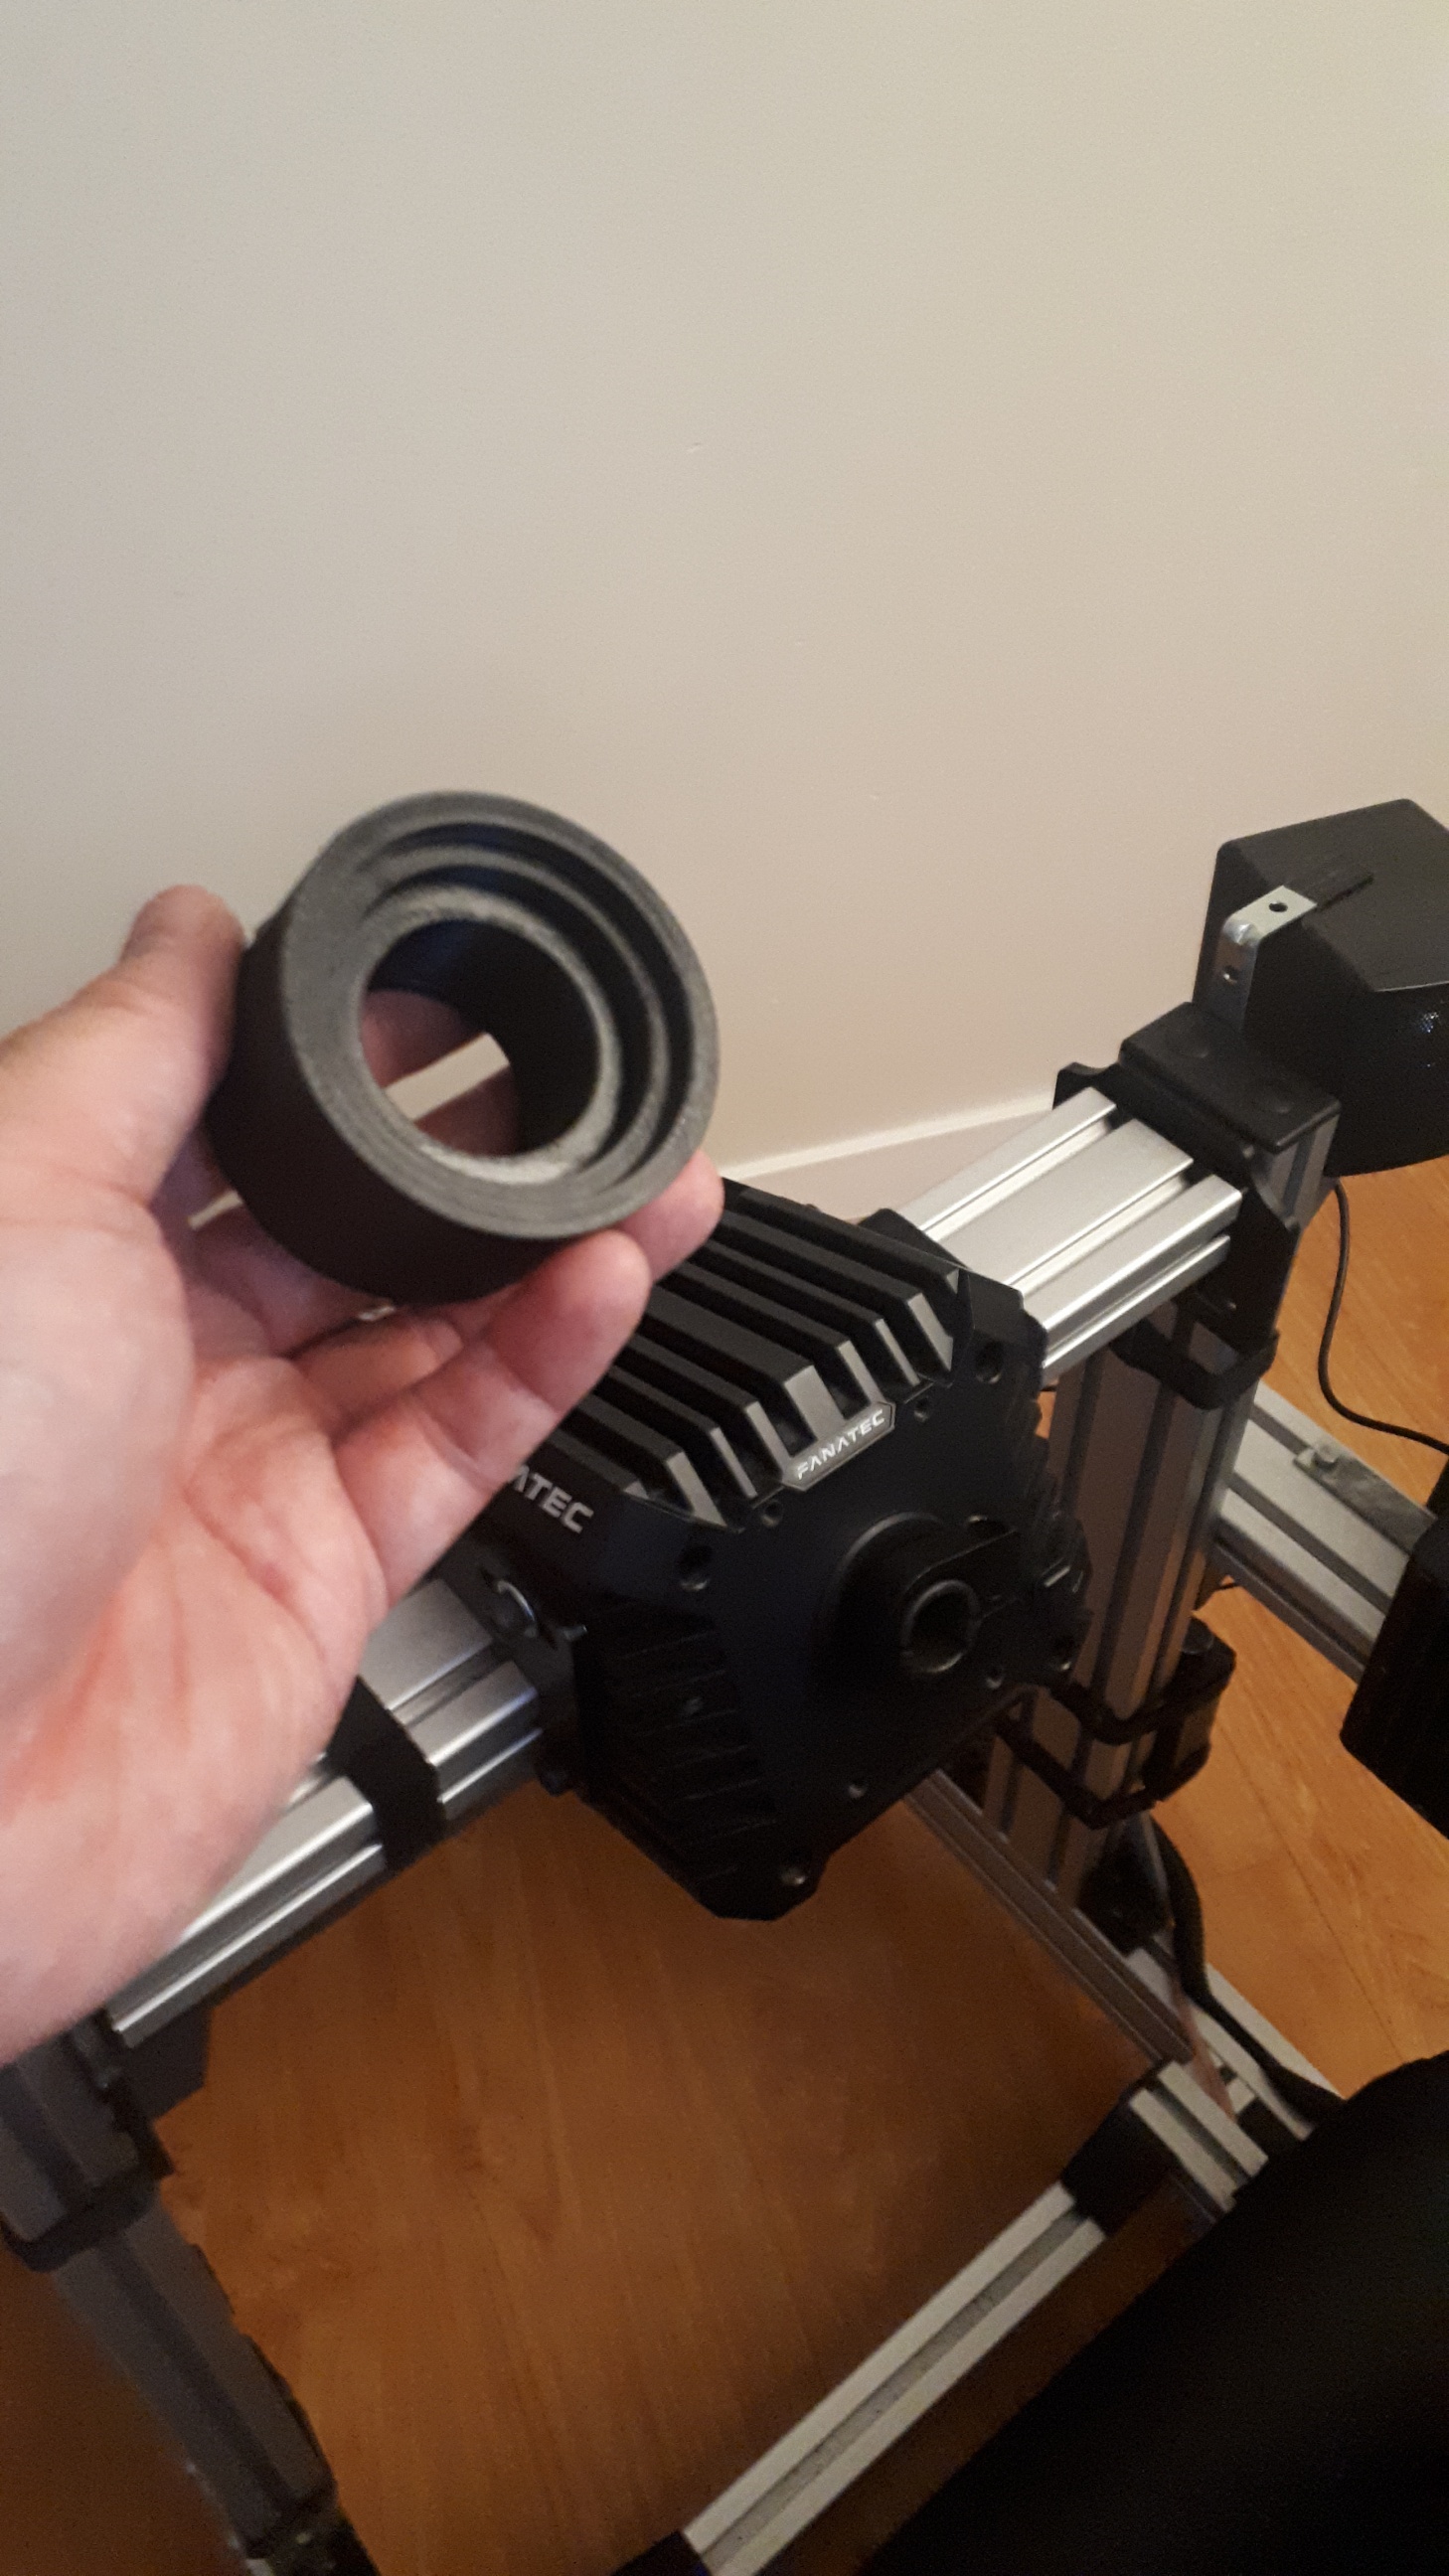
I used a 2.5mm bike bottom bracket spacer from my bike parts bin. They're cheap on amazon or a bike shop might just give you one.
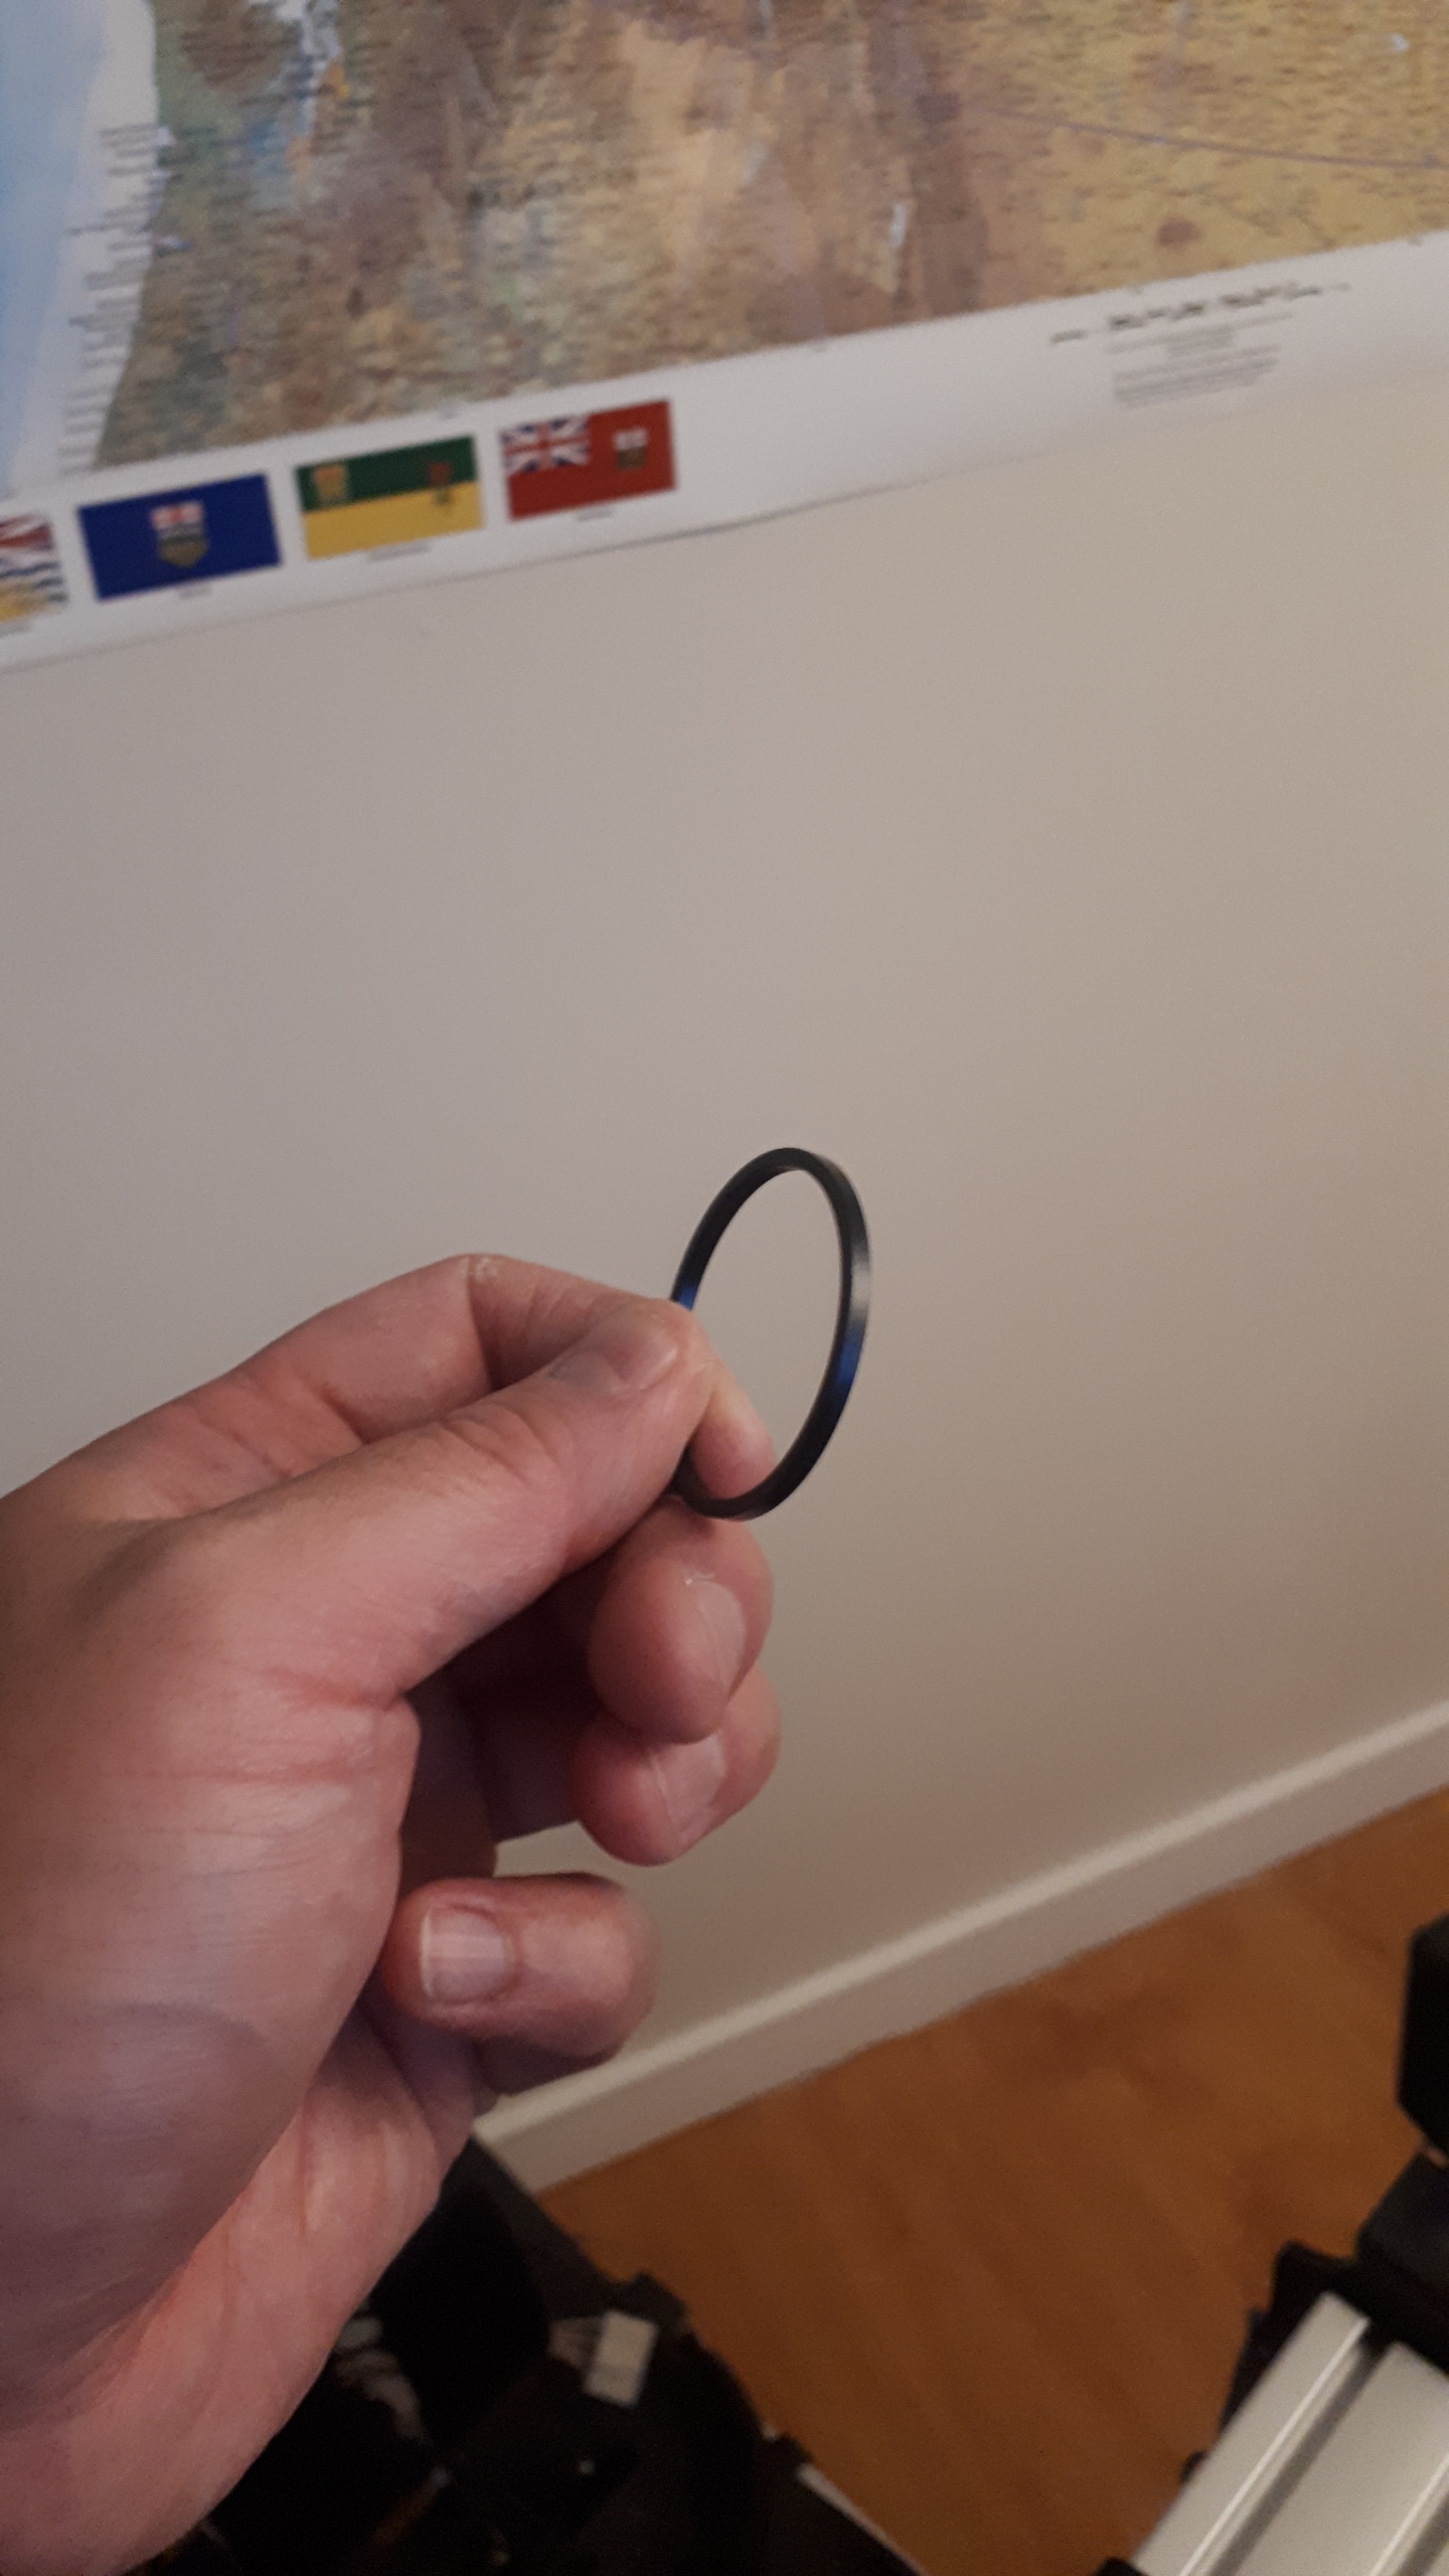
Put the spacer inside the sleeve thing
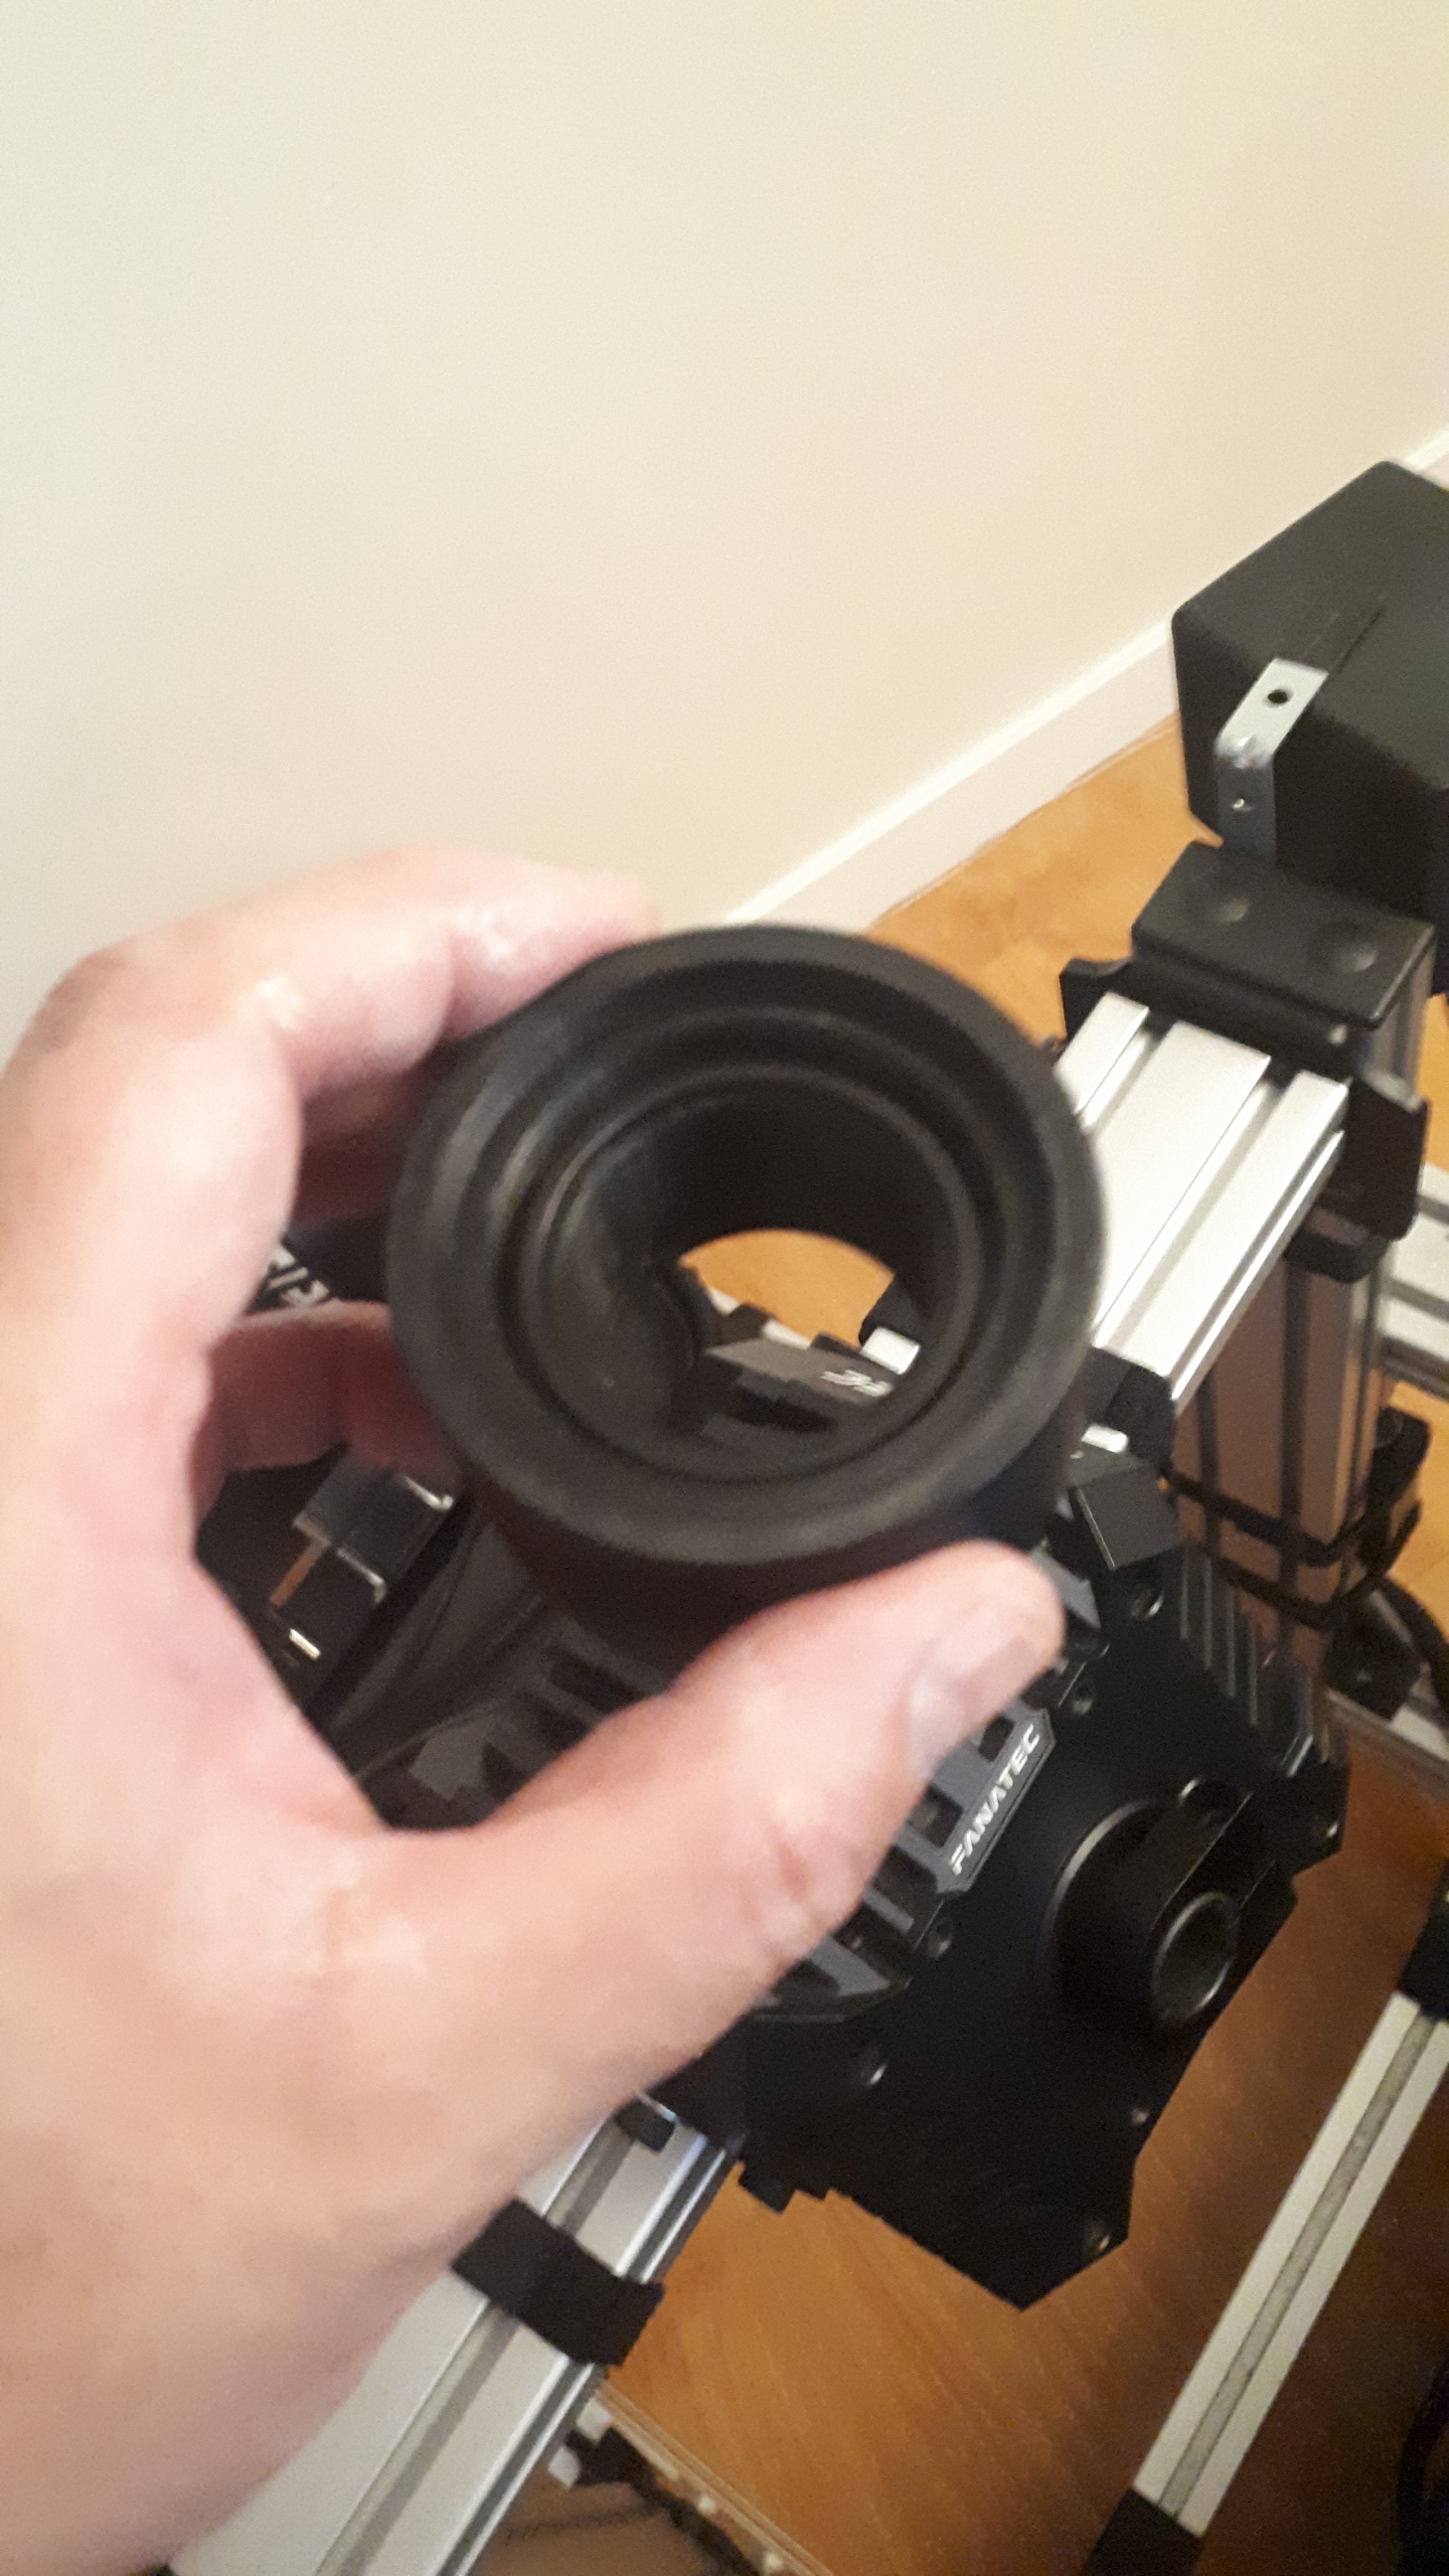
Put the stem through
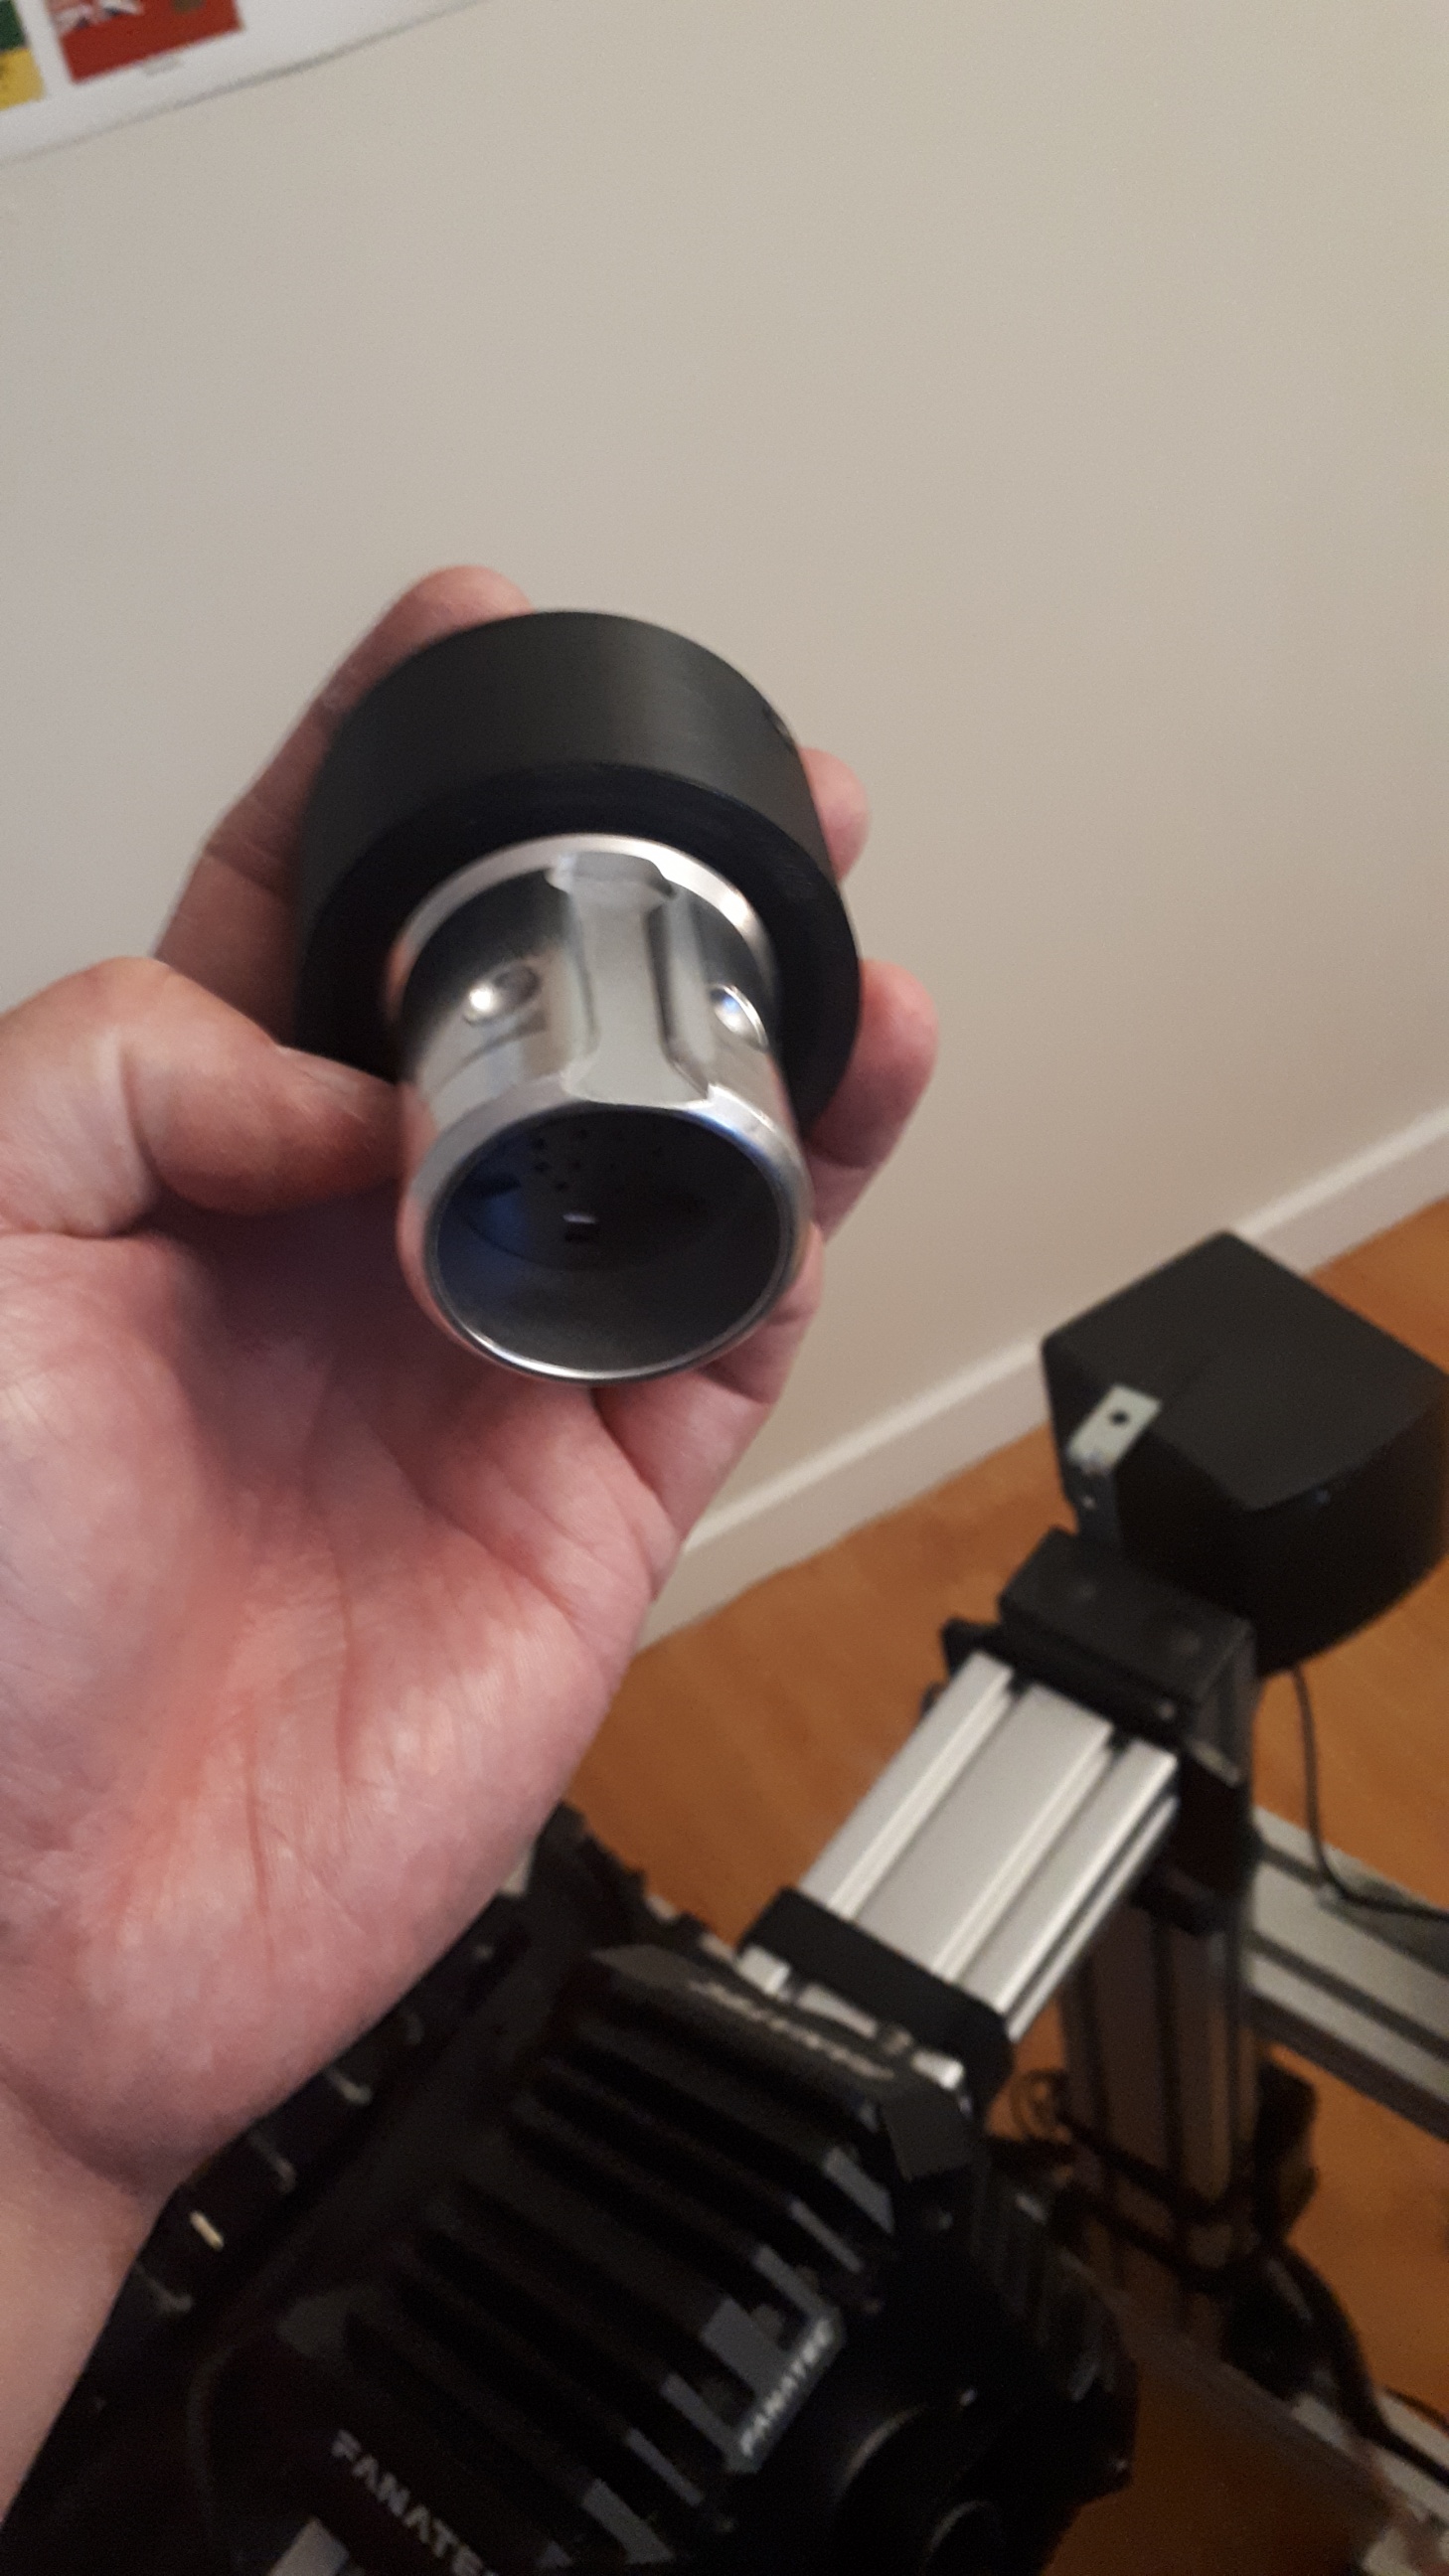
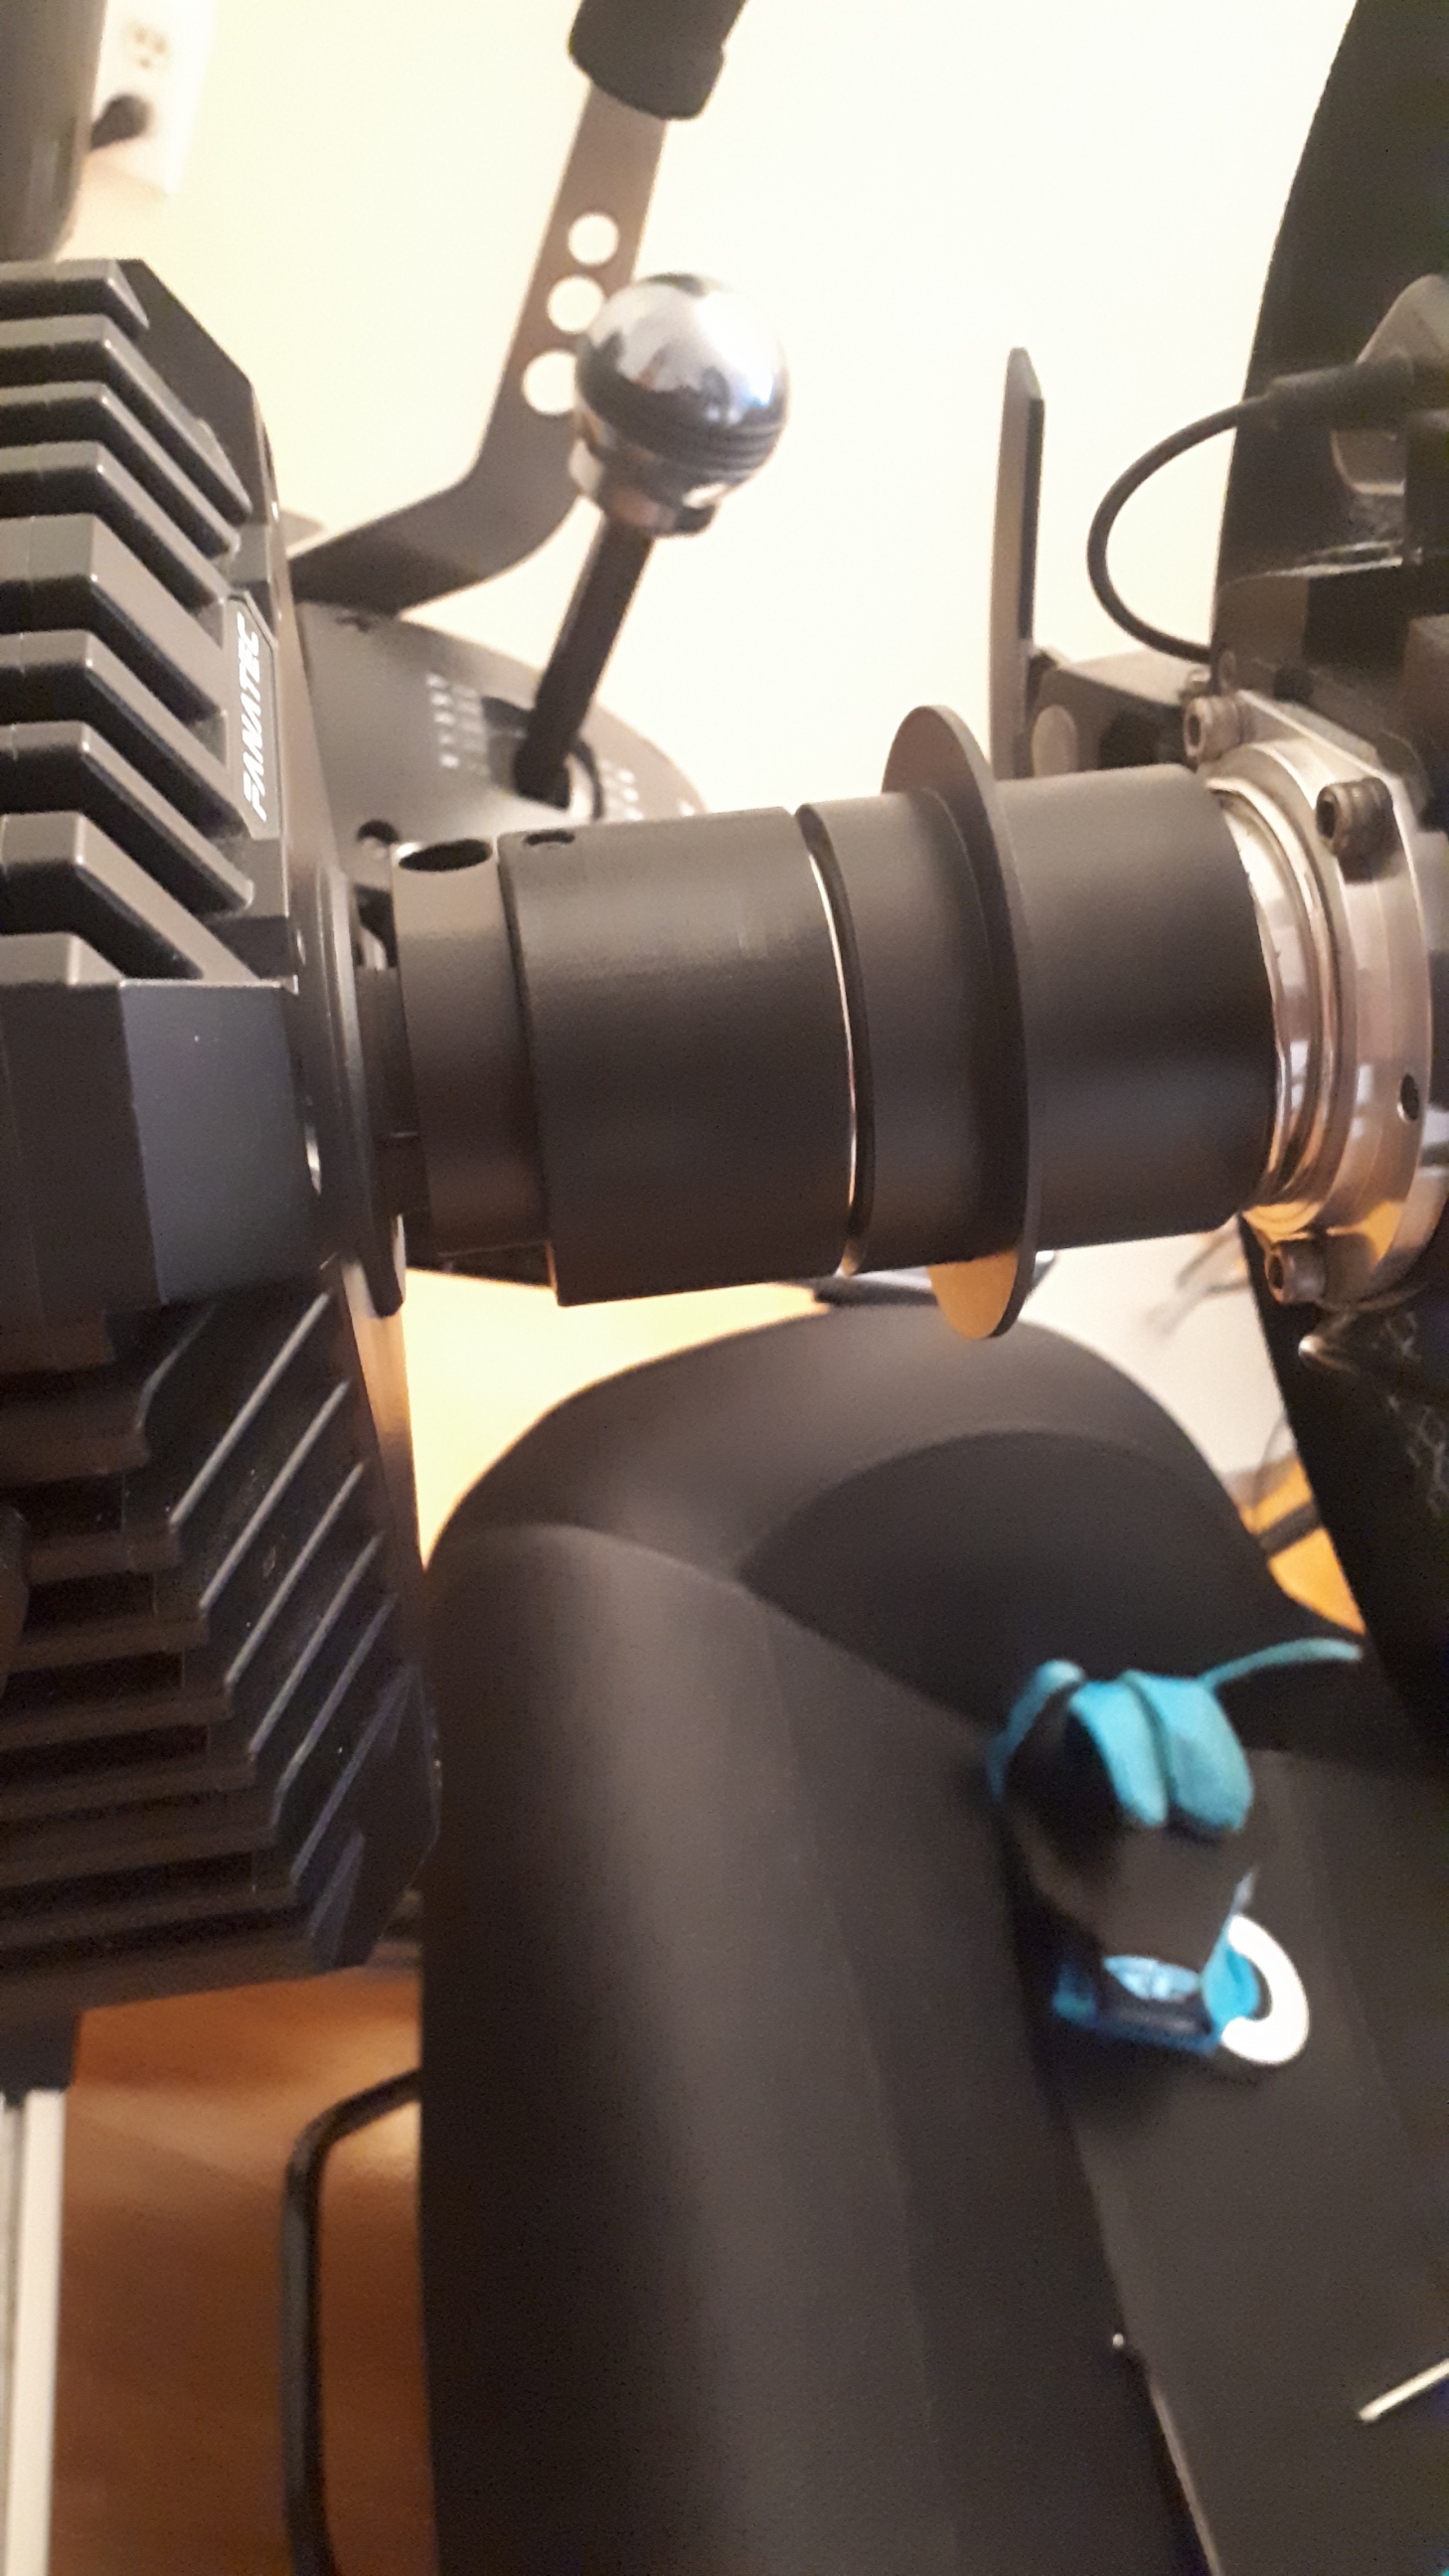
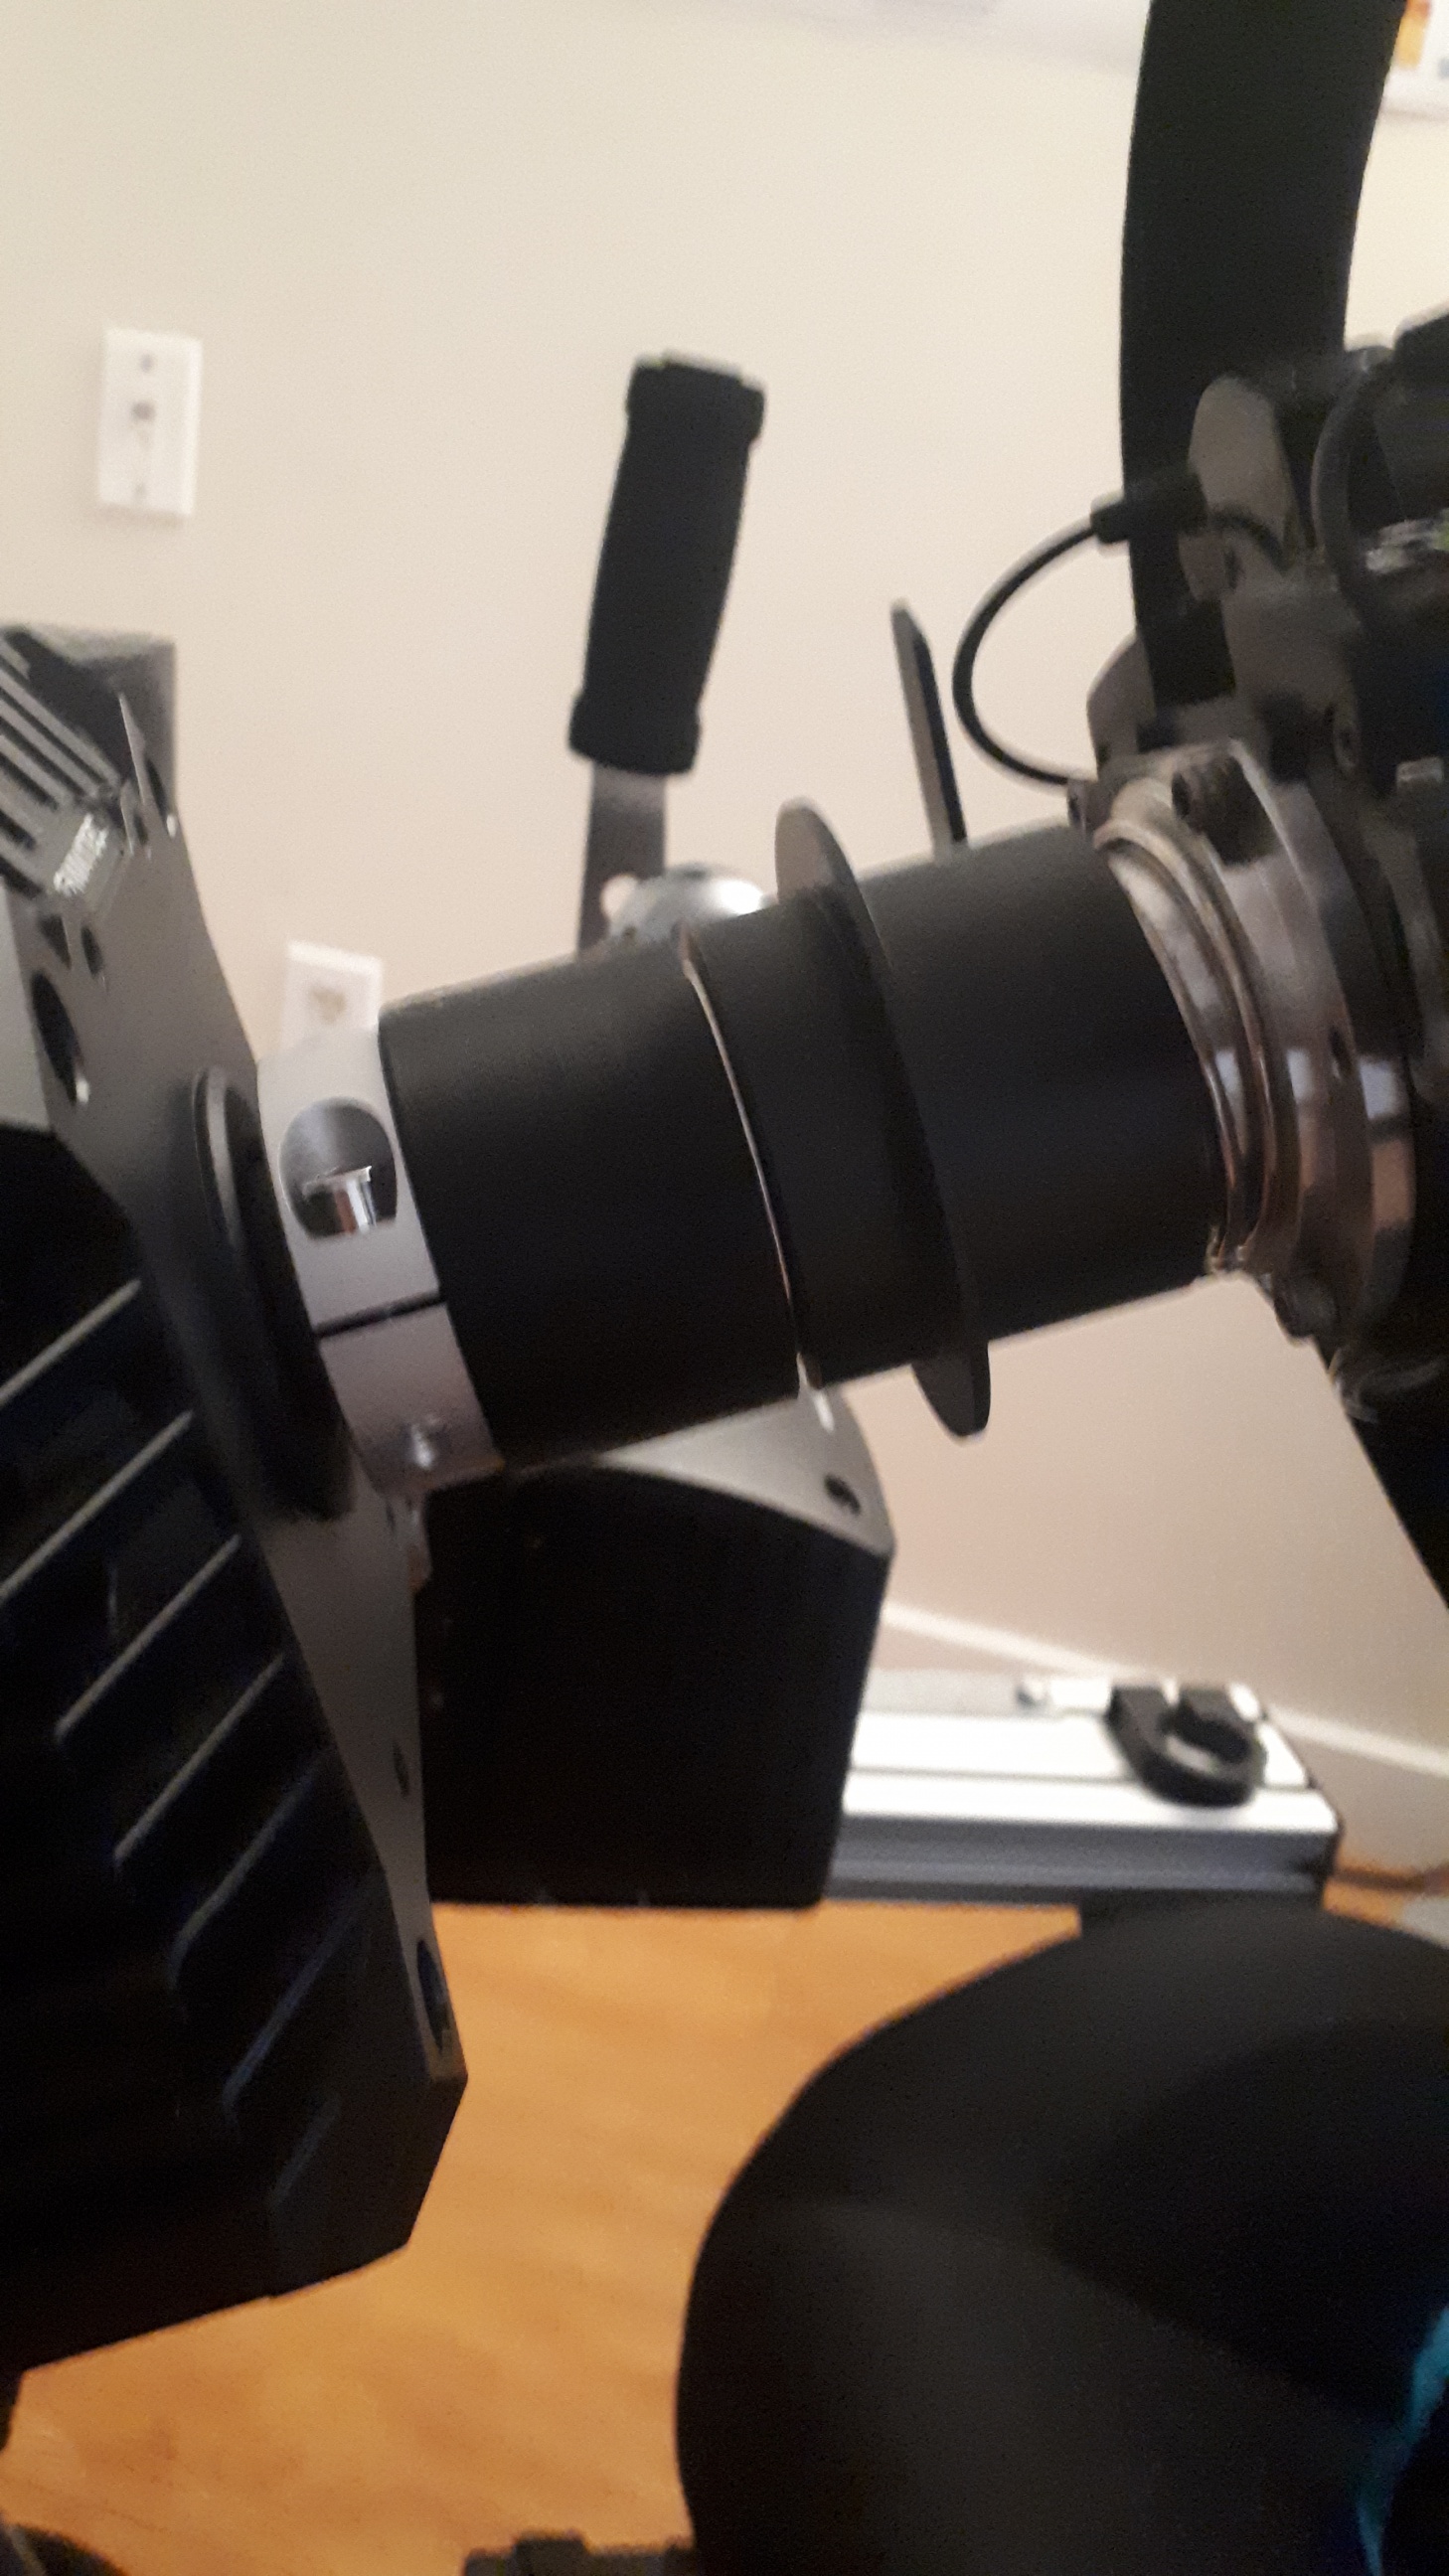
Put the collar on and tighten slightly just to hold in place. Then put the stem into the shaft. You cant see it but this is where the collar pushes to.
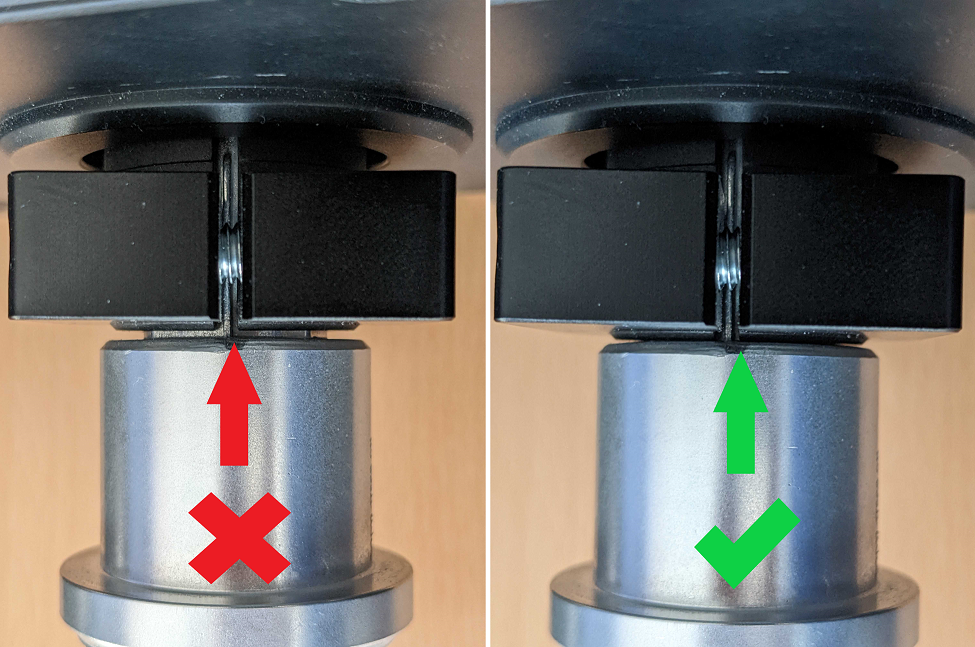
Now here's the trick. You've got to preload the collar, sleeve and stem against each other, like this, while simultaneously pushing the whole thing into the shaft. Having an extra set of hands help with one holding stem assembly and the other person tightening the collar helps. I just did it one handed.
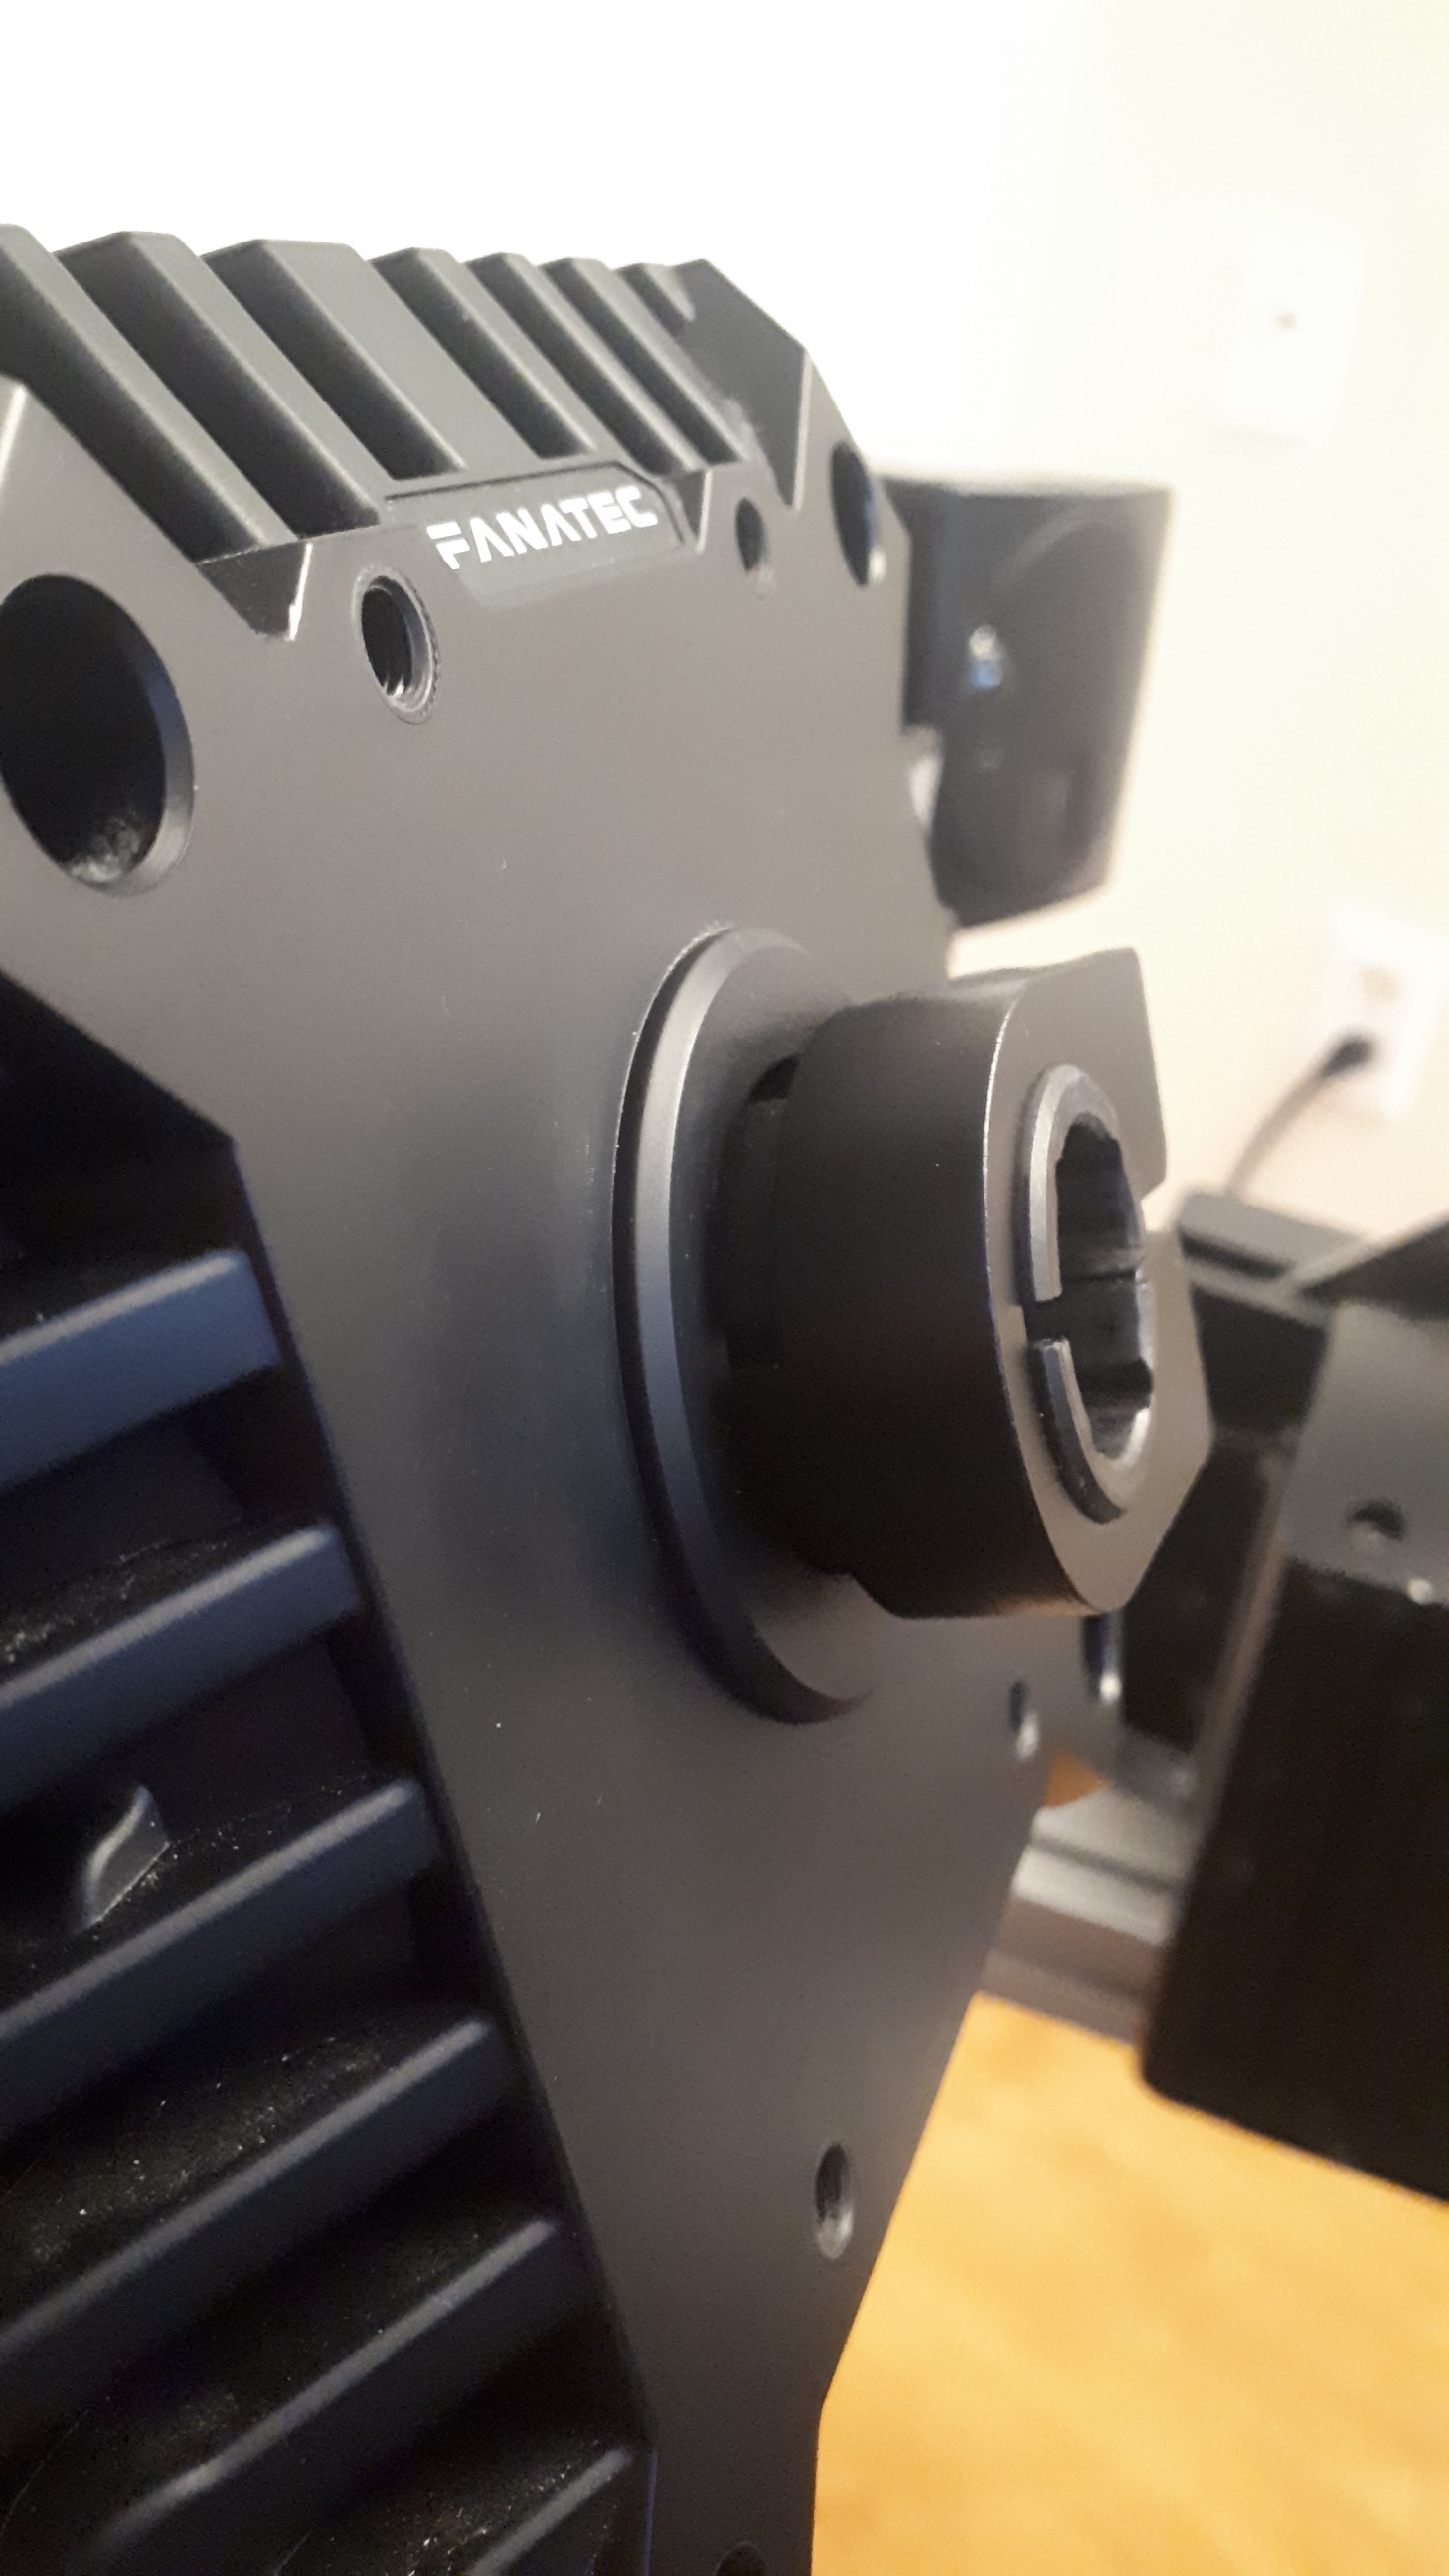
After tightening the collar check for any gaps between it and the black sleeve. Since the sleeve is imperfect just rotate it until there is little or no light between it and the collar. There should be no play in the plastic sleeve if you wiggle it. Then tighten the set screw in the sleeve.

End result is that there should be a lot less chance for that stem to move around if it is tight against the collar.
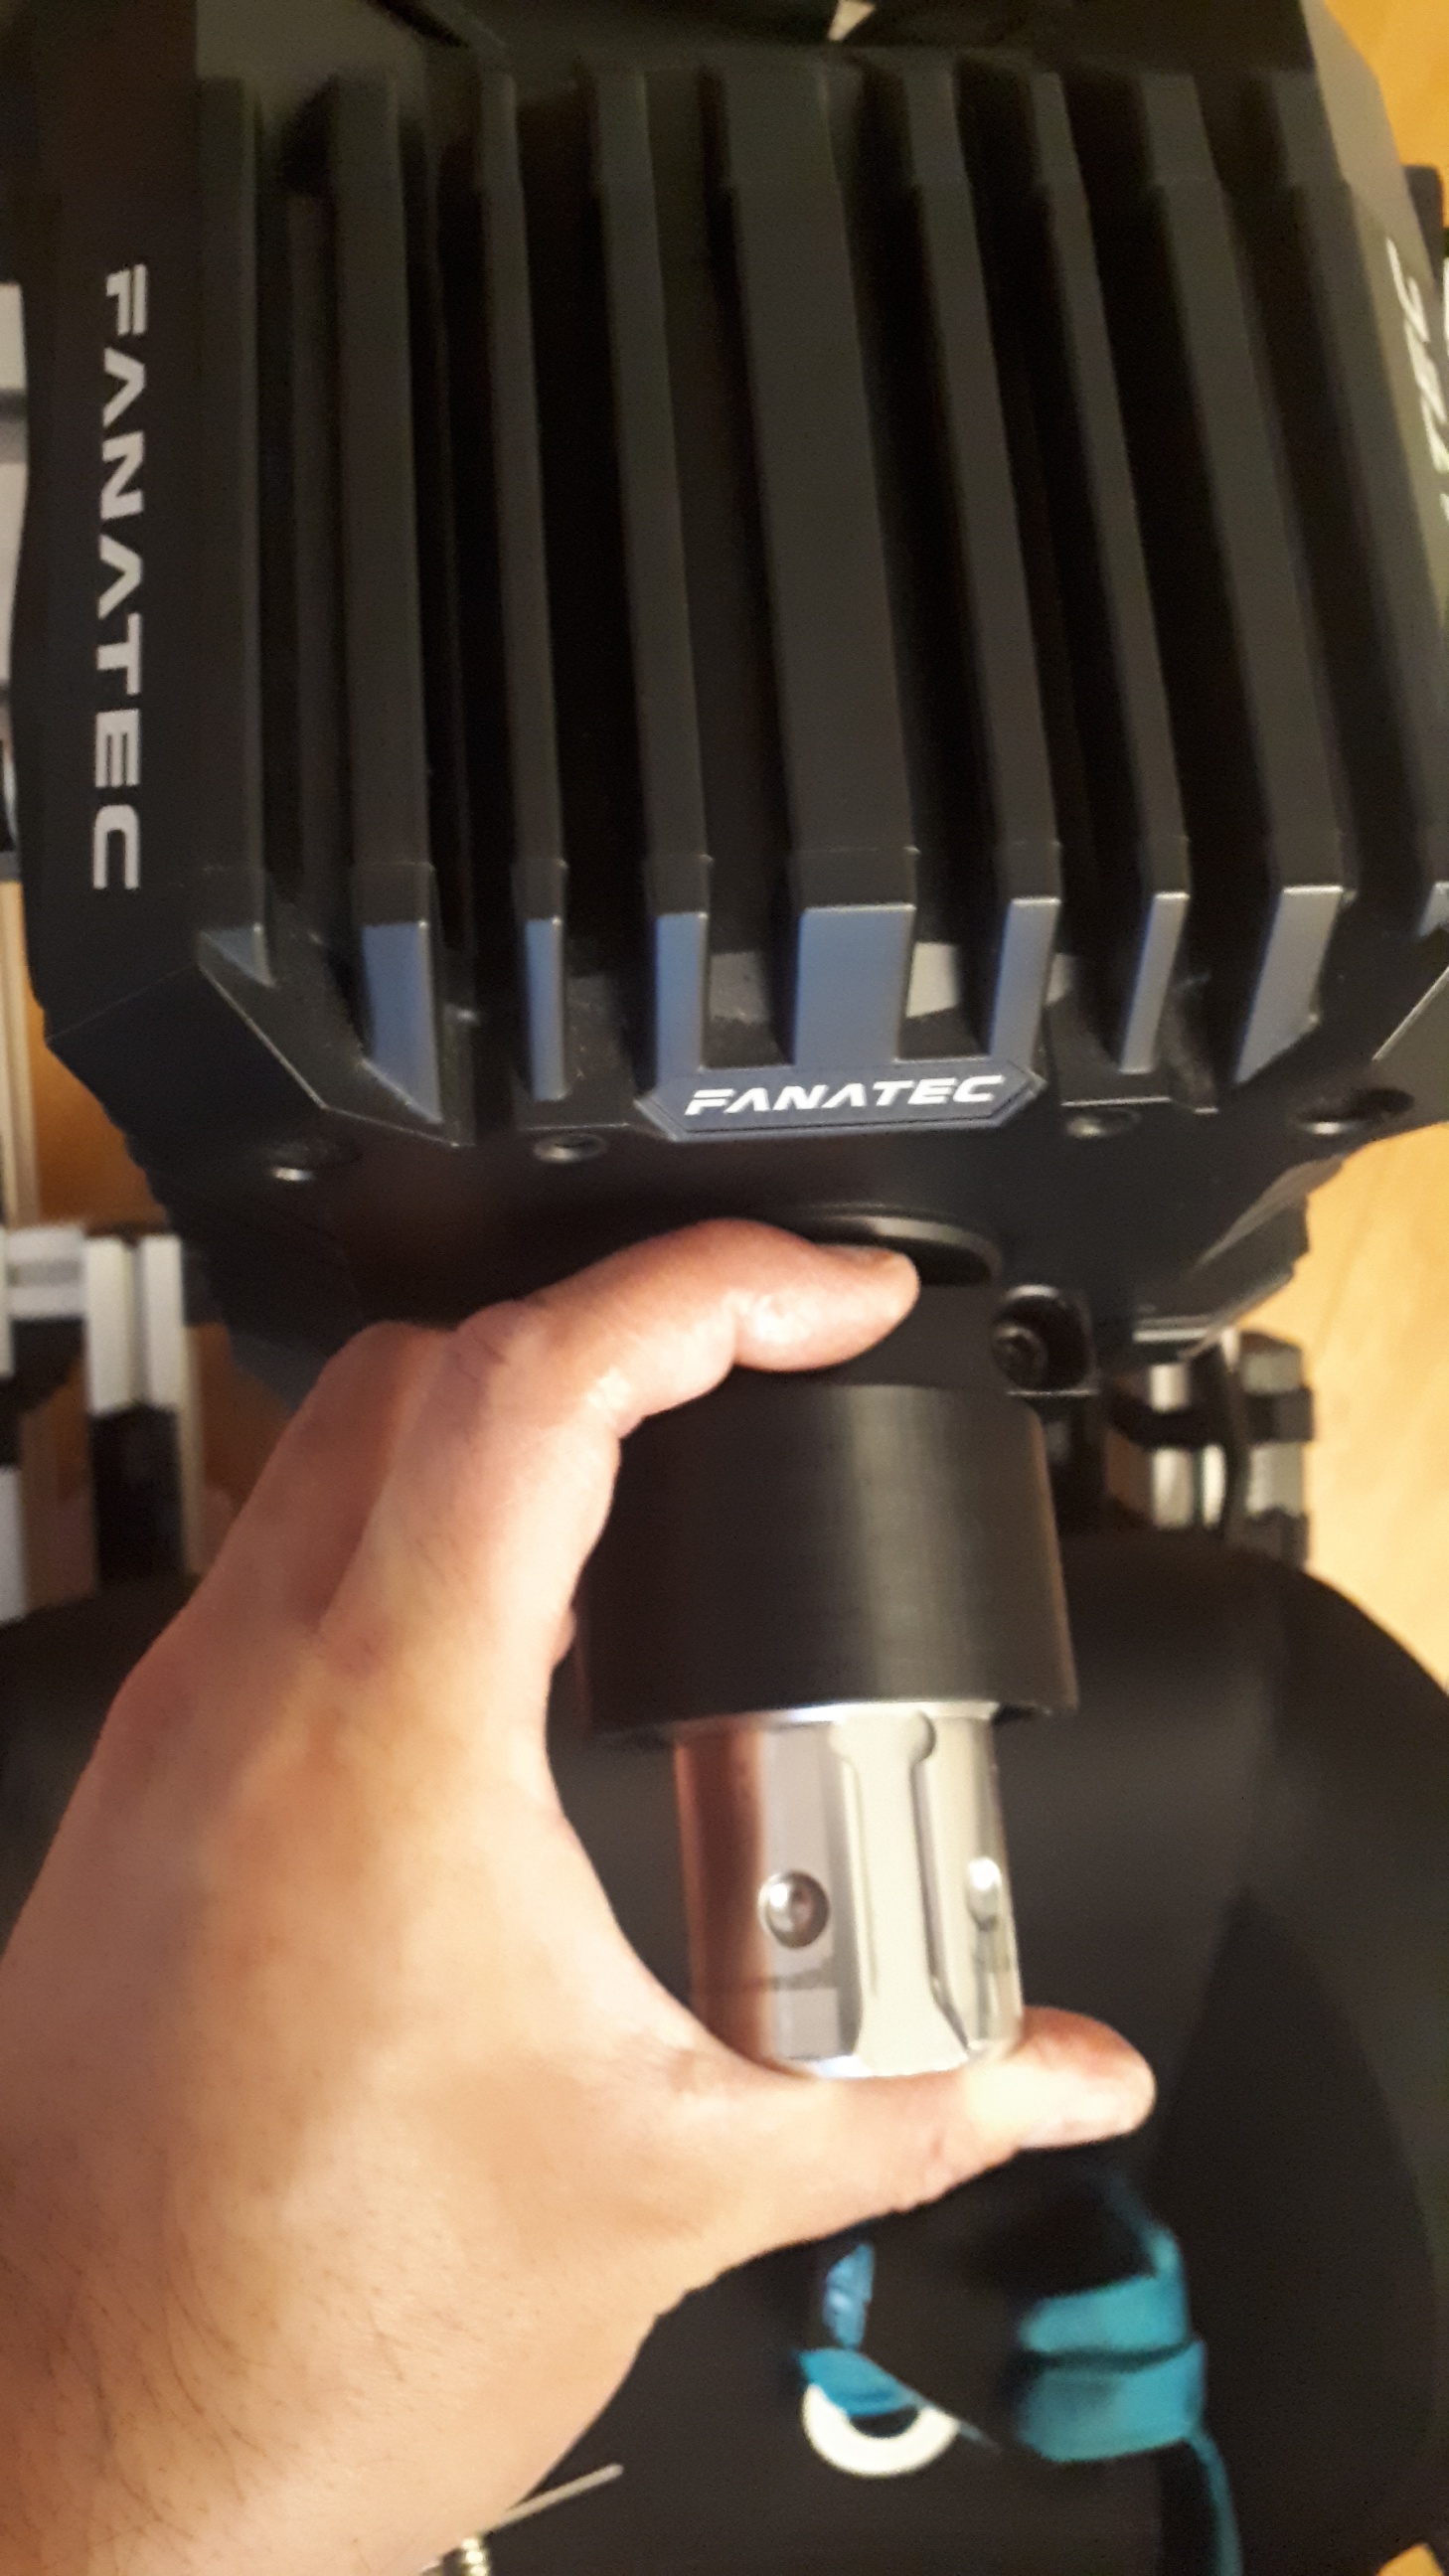
Now since my unit is out of warranty anyway I replaced the stock collar with a light weight 2 piece collar. I like the amount of contact area there is.
To me it feels a bit better than before but time will tell if I eventually get another disconnect. The goal was to give the collar and stem a stronger interface by backing the entire stem assembly up flush against the collar so pre loading is the key. I think a 3d printed sleeve that is at least as wide OD as the widest part of the stem and as long as needed to properly space the collar on the shaft is ideal. If the piece I bought was just 2 to 2.5mm taller it would have been perfect.
Comments
there was a solution in youtube from one guy how solve this forever, he use similar method like quick release is made by using the bearing for stop that for moving, very cheap solution, not sure why fanatec self not come for this idea
Do you have a link to the video? Is it an elaborate mod? I only did this because I already had the flex fix thing and wanted to experiment without spending any more money.
https://www.youtube.com/watch?v=yVZn8yUnZsE
need be careful with this and not over drill, but it cost less than eur if have tools
Oh dear God. I'm too chicken to be whipping out a power drill.
well, at that money what this double shaft clamp cost , you could fix with that cheap solution around 2500 csl dd devises.
moza not make this childish mistake tho , so they products not only last longer but they also get more profit as need repair less
Why not just tighten it to specification with a torque wrench, 15 Nm? It won't budge ever, no matter what.
And yes, it's a shame that it isn't tightened properly from factory.
15 Nm measure tool may cost self like 37 eurs. if calculate all those together ,fanatec product not relay comes that cheap as you think ed first place
i to see also issue in this image what allot may not even know, you see that bolt at there? that is a cheap Nm bolt what may lose self over time the Nm as it's much weaker .
now my product have black bolt, but i not know if its just colored or actual rated strong one, because when you read at in fanatec product ,
its Typed made in china
by default if product rated at 15 nm im assuming they use Grade 12.9 bolt but in short usage the Grade 10.9 works aswell
in here that guy uses for his product also shiny bolt, im not sure if its chromed or just another cheap bolts
I've had my DD Pro for nearly 18 months and have probably 1000 hours use without issue. I did undo the clamp last year because the shaft was slightly off centre on rotation. I tightened it to 15Nm and have never suffered with disconnects or the clamp loosening over time (no disconnects before doing this either).
that is good i quess, but look back in history some guys loose they shaft at time when they raced. even if they now use better bolts those people not forget who had bad experience
also you tell 15 Nm, not everyone actually want buy them self the expensive 15Nm measure tool , so it could be that some may only used 5nm or 10Nm instead with they hand strength
imagine a guy who spends all his last penny for buy himself a DD and then turns out he need buy also something like this
https://wheelability.myshopify.com/products/tool-kit-torque-wrench-set-2-24-nm-black-cas?shpxid=c4e7ae62-9cf0-44dc-97ef-3c1e22fdc843
Agreed you shouldn't need to buy an expensive tool just for that, lucky I already had one for doing stuff on the car.
question would be tho, does Fanatec borrow they 15 Nm measure tool for people, as that mistake comes from them not from customers
I work on my bikes so I do have a torque wrench available. 15 Nm is a LOT, especially when the instructions say 10 Nm.
I split the difference and went 12 to 13. Dis connects still eventually happened and I don't think 2 Nm would make the difference. I still had to loosen the collar, reset the stem, align it as straight as possible and clamp it up again. It's just a flimsy interface. And if 15 Nm is officially sanctioned by Fanatec that is a crazy amount of leeway. I mean, what is even the point of a specific torque value if you can just go over it by 50 percent?
Maybe 10 Nm is a minimum? Maybe it's meant for the 5 Nm and not the boost? Either way that amount of torque on one bolt makes me nervous. The reason I got a 2 piece clamp was when I was inspecting my clamp and saw some material on the bolt thread.
I like the 2 piece clamp because it clamps evenly and the aluminum ones weigh about the same as the stock clamp. The steel ones might be overkill since you don't need as much torque with 2 bolts as you do 1. I'm using 6 Nm per bolt right now and it's been rock solid so far. Several hours of use later at 100 FFB and the only thing that doesn't feel solid is the crappy qr1.
That 10Nm graph is old and inaccurate.
15Nm is the exact torque.
For a two-piece clamp, the torque varies between 8 and 10Nm, depending on the shape of the clamp.
torque comes from bolt/nut quality, if you over torque then you simply damage that, it could be that old days it was 10Nm
The bolt withstands 15Nm without a problem.
10Nm does not guarantee a problem-free connection, so it was changed.
anyway 15Nm is a 1.52957 Kg force right ? i guess young guy could not pull this out but muscle guy could todo that
Some people can, some people can't, it also depends on the length of the hex tool.
problem is tho, to i need save my money just in case for this expensive tongue tool because i not have this at nearby / or buy a new fanatec steering wheel
or calculate all this together and it turns out that moza is actually allot cheaper and i got scammed by fanatec
10 Nm was in the instructions that came with my DD. So yeah, great job Fanatec. The bolt in the stock clamp is steel but the clamp itself is aluminum. If 15 Nm is fine then okay, but having to google "csl dd disconnect issue" to find out is lame. The other issue with the stem is that it doesn't self align. After inserting it and tightening the clamp you still have to check the rotation because even a tiny bit off axis is multiplied when you put a wheel on. I always had to align it by eye after rotating the stem over and over. Then I had to try to hold it as steady as possible with one hand while tightening the collar with the other. And the collar would always move around requiring me to loosen and reposition. The way I have mine set up is self aligning since the collar, sleeve and stem are all squeezed together. Now my wheel spins true and should stay that way disconnections or not.
I sincerely hope that when the qr2 comes out, hopefully in my lifetime, that they revise the stem and collar clamp to be integrated. If it's just the same stem with a qr2 end then ugh.
i not have issue with they aluminum qr1 one, it not move not a single millimeter.
so qr2 not make any difference
if qr2 comes similar like Moza one then we actually could start talk about difference, because currently one have free pins what is hard to damage and another one what can easily be damaged
It would be simpler and cheaper to buy a two piece clamp that does not require more than 10Nm of torque and which anyone can apply, and even if you exceed it by 2 or 3 Nm, it is not a problem.
I think it's cheaper to just drill a hole straight through and then add a bolt with a nut.
Note: there are cables inside so they need to be removed first.
The QR1 base side is not intended to be disassembled and you will most likely damage it during disassembly, I've already damaged one during disassembly.
ok, then i skip that idea, but that seems still for me as cheapest solution and not need much worry about the correct Nm either https://www.youtube.com/watch?v=yVZn8yUnZsE
in that video there is one small thing, you probably should add tape behind that hole ,
just in case for avoid that bearing ball drop inside the base,
you really not want this happen.
The 2 piece clamp really is the best solution. Just make sure you apply the same amount of torque to each bolt by going back and forth between them so that the gap is even on both sides. You can get a cheap mini torque tool on Ali/Amazon/Ebay. Even your local bike shop may sell one. They should be under 30 bucks and come in 3 to 10 or 10 to 20 Nm ranges.
yeah, but they steering wheel cost 199.95, 30 about this tool and double clamp cost around 20 it means i'm 50 too short for buy they steering wheel
my steering shaft is not loose yet, but i now need just worry every day that one day may this happen